


Anomaly Interception
Anomaly Interception (A.I) is the latest game mode which was released on the 22 August update. To unlock this mode, you have to clear the boss of Chapter 22 (Nihilister again).
Introduction
A.I is an upgraded version of Special Interception - a mode which provides us gears and Custom Modules. It has better rewards, and is much more difficult too. To access this mode, you still have to go to the Ark.
Instead of seeing Special Interception, you will be in this new default interface:

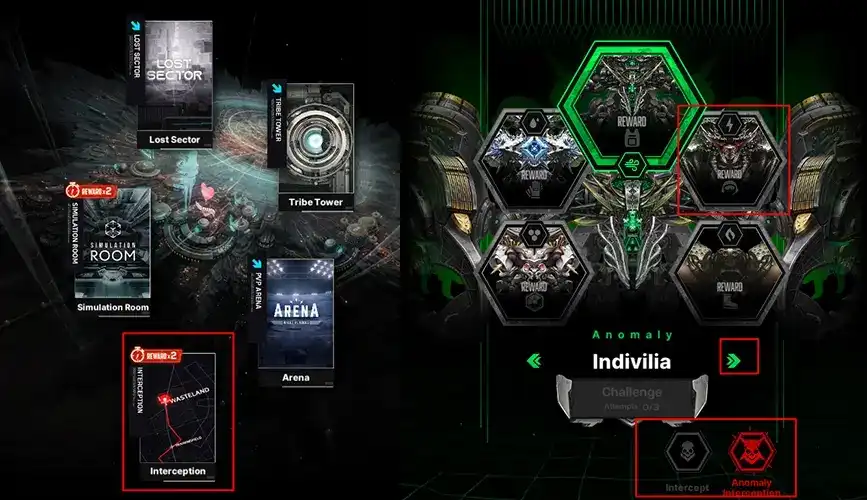
In this mode, you can fight 5 Bosses. You can choose whichever boss you want to fight (they give different rewards, mind you) by clicking the boss’s icon directly or clicking the left and right arrows.
You can also switch back to the normal Interception interface by clicking the toggle at the bottom of the screen.
Boss and Rewards
Before we go in the detail of each boss, you need to know some basic advantages/disadvantages you will have to deal with:

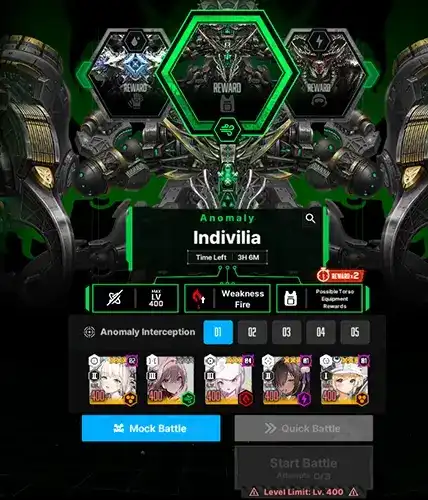
- All Nikkes are capped at level 400. It’s CAPPED, not FIXED, which means if you are lower than 400, you are at your current level. If your level is higher than 400, it’s 400.
- Boss will deal extra damage on Nikke that has the element weak to it. For example, Indivilla is a Wind Boss, so she will deal extra damage on Iron Nikkes, which are Crown and Liter on the picture above.
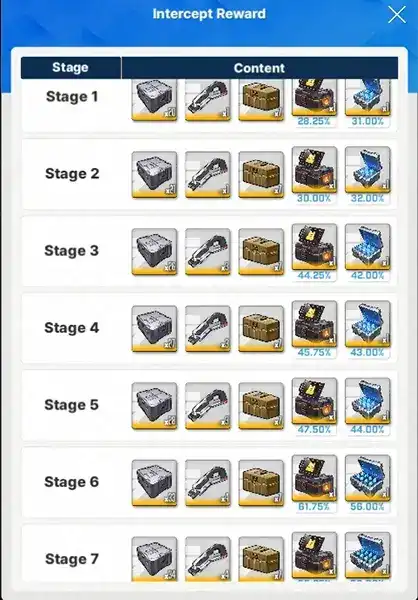
- There are a total 9 stages of rewards for each boss, but the reward from stage 7 to stage 9 are all the same so you only need to grind till stage 7 only. But before we go deeply into the reward, we did some comparisons for you.
Here's the full list of rewards per stage:

Which is better? SI stage 9 or AI stage 1?

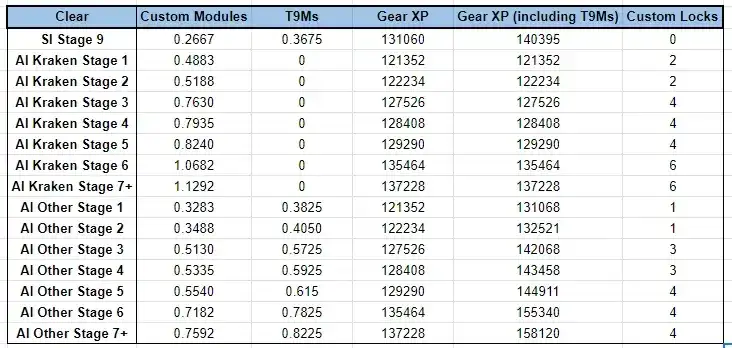
Credits: Akusetsu from Nikke Community Discord
As you can see, AI Stage 1, doesn’t matter which boss:
- Gives more Custom Modules.
- Gives the new Custom Locks.
- Gives a little less Gear XP which won’t be an issue over the long run.
- You can choose the specific drop (only Helm, only Gloves…) from A.I but not S.I.
- SI gives a slightly higher chance to drop random Manufacturer T9 Gears than A.I stage 1 and 2.
Hence, always do Anomaly Interception the moment you unlock it, no matter if you can pass stage 1 or not.
Here's the list of the bosses and what they drop:
Kraken
Element:


Weak to:

Strong against:

Drops:
Custom Modules, Custom Module Shards (100%), Custom Locks, normal T9 gears.
Mirror Container
Element:

Weak to:
Strong against:

Drops:
Custom Modules, Random GLOVES Manufacturer T9 gears (small chance), Custom Locks, normal T9 gears, Manufacturer Arms (collect 200 to exchange 1 random Manufacturer T9 gear).
Indivilla
Element:
Weak to:
Strong against:
Drops:
Custom Modules, Random ARMOR Manufacturer T9 gears (small chance), Custom Locks, normal T9 gears, Manufacturer Arms (collect 200 to exchange 1 random Manufacturer T9 gear).
Ultra
Element:
Weak to:
Strong against:
Drops:
Custom Modules, Random HELMET Manufacturer T9 gears (small chance), Custom Locks, normal T9 gears, Manufacturer Arms (collect 200 to exchange 1 random Manufacturer T9 gear).
Harvester
Element:
Weak to:
Strong against:
Drops:
Custom Modules, Random BOOTS Manufacturer T9 gears (small chance), Custom Locks, normal T9 gears, Manufacturer Arms (collect 200 to exchange 1 random Manufacturer T9 gear).
Custom Lock
Custom Locks are the new item introduced in this patch. You can spend a certain amount of Lock to… well, lock an OL line before you reroll it.


Custom Locks can only lock your line 1 time, while spending 2 / 3 Custom Modules will lock that line forever until you unlock it.
If no lines are locked, you need 20 Custom Locks to Lock one line. If one line is already locked, you need 30 Custom Locks to lock the second line.
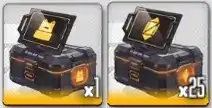
T9 Manufacturer Part Equipment Box / Custom Module Shard
Depending on what Boss you fight, you can collect either Custom Module Shards (Kraken), or T9 Manufacturer Box (the part that drops depends on the Boss you are fighting).

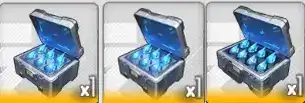
Custom Module Shards:
- 100% chance of shards dropping. You need to collect 100 shards for a guaranteed 1 Custom Module.
- If you can clear stage 6 Kraken, you guarantee one rock drop every day.
T9 Manufacturer Box
- Unlike shards, no guarantee of this T9M Box dropping. The higher stage you clear, the higher the chance of this box dropping.
- The part that drops depends on the Boss you fight (you can find which boss drops which part in the info given above).
Custom Module Random Bonus Drops
This is the bonus reward you can get once you finish a run against any A.I boss. The higher stage you clear, the more the chance of this Bonus Drop. As a bonus, the higher the stage you clear, the higher the chance of more than 1 rock dropping (capped at stage 7). At stage 6 and above, you can even get 3 rocks, otherwise you can only get a maximum of 2 rocks per run (1% chance)!

The maximum possible rocks per run are 3, for a total maximum of 10 a day (including 3 runs and the custom module shard box from Kraken). The total maximum possible in a day is 20 custom modules during double drop weekends!
In case you are wondering what’s Overload, who you should spend those blue rocks on, don’t worry we got you:


Whatever you lack, just fight the corresponding boss to hopefully receive the item you lack.
Bosses and teams
Each boss has a different strategy, and more in-depth guides will be released soon in the near future. In general, Liter and D:KW are the best Burst I units to use, except against Harvester where Dorothy is the BiS B1 due to her elemental advantage. The best support unit is Crown, who can be paired alongside Naga (except for against Kraken), who easily kills Naga due to Naga’s element being weak to Iron. If you lack Crown, just use the best support structure you may have available: Tia-Naga, Blanc-Noir, S.Rosanna+Helm, etc..
For now, to fill the B3 spots of your team, you can pick and choose DPS from this table against each boss:
Kraken
Element:
Weak to:
Strong against:

Mirror Container
Element:
Weak to:
Strong against:
Indivilla
Element:
Weak to:
Strong against:
Ultra
Element:
Weak to:
Strong against:
Harvester
Element:
Weak to:
Strong against:


Doro after retrying 127627955 times on A.I