character from the Attacker class, who wields a Assault Rifle
weapon and belongs to the Wind
element. She's part of the Tetra
faction.
To learn more about Sakura: Bloom in Summer check the sections below. Use the tabs to quickly switch to the kind of information you're looking for.
To learn more about Sakura: Bloom in Summer check the sections below. Use the tabs to quickly switch to the kind of information you're looking for.
Profile
Review
Investment tips
Teams
Profile
Skills
Normal Attack
Normal Attack
Assault Rifle
Mode: Normal
Ammo: 60
Reload: 1s
■ Affects Target(s).
Deals 13.65% of ATK as damage.
Deals 200% damage when attacking core.
Skill 1
Bloom
Passive
Cooldown: -
■ Activates at the start of the battle. Affects self.
Forcefully uses Skill 2.
■ Activates when an ally or self destroys an enemy's part. Affects self.
Sustained Damage ▲ 5.1% for 30 sec.
■ Activates when an ally or self destroys an enemy's part. Affects self during Dancing Flower.
Dancing Flower Duration ▲ 10.02 sec.
■ Activates when an ally or self destroys an enemy's part. Affects all enemies who are in Sakura Petals status.
Sakura Petals Duration ▲ 10.02 sec.
Skill 2
Full Glory
Active
Cooldown: 30s
■ Affects self.
Dancing Flower: Attack Damage ▲ 15.64% for 15 sec.
■ Affects the enemy with the highest ATK.
Sakura Petals: Deals 256% of final ATK as sustained damage every 1 Sec for 15 sec.
Burst
Ephemeral Spender
Active
Cooldown: 40s
■ Affects random enemies.
Deals 457. 14% of final ATK as damage. Attacks sequentially for 10 time(s).
■ Affects the same target(s).
Deals 35.16% of final ATK as sustained damage every 1 sec, stacks up to 10 times(s) and lasts for 10 sec.
Specialties
Debuffer
Stack Oriented
Voice Actors
ENG
-
JPN
-
KR
-
Gallery
Review
Review
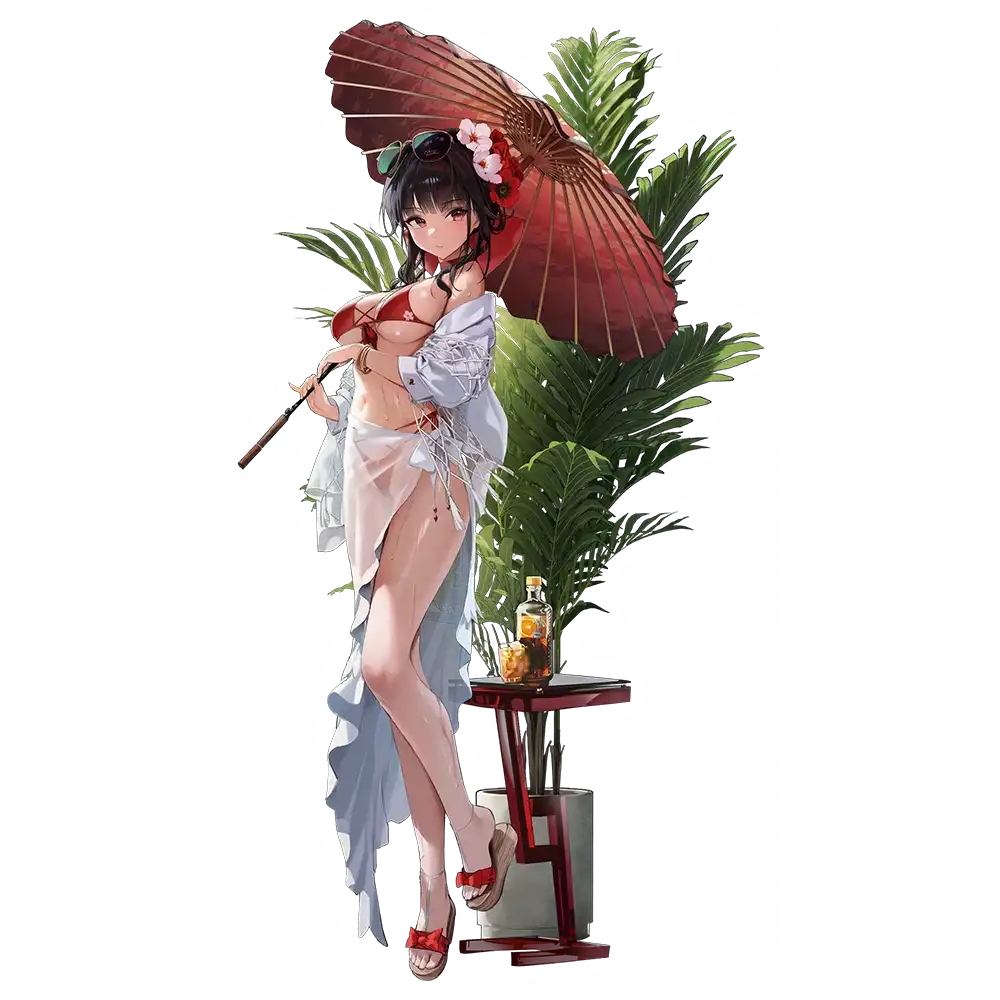
The summer version of our charismatic Underworld Queens, heralded by the vivacious head of Seimeikai, is making their second debut in the tropical islands! While the scorching heat and blistering sands may be a deterrent, nothing compares to a tranquil oasis off the urban haze. Sakura is enlivening the coast with newfound look and armament, allowing her to become just the formidable DPS that applies serious debuffs, dealing sustained damage to her opposition through breaking parts and whatnot.
Can you give a brief summary about this unit?
Sakura's summer version, or S. Sakura, is reborn as a DPS unit instead of her Support roots. Her main focus will be on Solo Bosses, since she gets worse if the number of enemies is high. Against Bosses, she gets better when the boss has regenerating parts. If the Element is in her favor as well, she can outdamage most meta units if she comes properly invested, even against the mighty Modernia! In neutral conditions, however, she performs at the level of Scarlet, except just slightly better and without the threat of HP drain. This makes S. Sakura one of the top picks for Solo Raids, but that's not all! Her performance in PvP is not to be underestimated, as she can be used to wipe enemy units as a nuker! Beware of Noah, however, since she can completely neutralize S. Sakura!
Should I pull this unit?
We believe in a simple: Yes! We are at a point in Nikke where Elemental Advantage in Solo Raid is becoming more and more important. Teams are becoming more coherent. We have seen some prominent DPS units dropping out and coming back in depending on the element of the boss! An example of this is none other than Scarlet, who now is a shadow of her once dominant former self, but still always has a spot whenever there is an Electric-Weak raid. Similarly, we do not have a lot of Wind DPS. Realistically, we only have Scarlet: Black Shadow, and Guilty if you want to be generous. The remaining slots are filled with the usual DPS like RH, Alice, Modernia etc. But now, S. Sakura can outdamage some prominent units, and thus will come into play against Wind Weak Solo Raid Bosses! Rest assured, when properly built, she will display exceptional results.
Pull a copy if you're new and lack a DPS unit for raids. Pull a copy if you are an old player since we're moving towards Element-based meta! One copy should suffice if you want to have an easier time aiming for higher rankings in Raids. If you main campaign and do not want to focus on Raids and PvP, you may skip her. As for duplicates, first and foremost, we must praise how good looking she and her MLB lobby screen are! Other reasons to go for dupes include aiming for Top 200 in Solo Raids, or if you take PvP seriously, since dupes contribute a lot to CP.
Tier List
Campaign (LD) - A | Campaign (HD) - B
S. Sakura faces a big problem in campaign-type stages, something we have witnessed before with Scarlet: Black Shadow. Her damage that comes from her burst, which can stack DoT if it hits the same enemy, is divided into 10. It tries to hit 10 units, and if it can't, it constantly hits the available targets in a cycle. On a Solo Boss, her burst can target the same single enemy and do big numbers every second the DoT procs. However, when there are more enemies available, she does the same amount of damage, but it gets diluted (similar to how distributed damage becomes diluted the more enemies are on the screen). Unfortunately, in the case of SSakura, she does not hit as hard as SBS, not even close if we are being honest. Additionally, due to her not having inherent ATK buffs, her performance starts lagging behind in High Deficit Campaign as well. As a result of all this, her damage gets extremely diluted, making her an extremely hard unit to use for Campaign.
Boss (Solo) - SS | Boss (Adds) - S
S. Sakura's domain is against Bosses. If we go into specifics, it is against Bosses that either have abundance of parts (that regularly respawn), or are weak to the Wind Element. She can easily outshine most prominent units, such as Scarlet. SSakura performs exceptionally well against single targets, and can prove to be a competitor of none other than our well known Queen, Modernia! If you play on a lower FPS, she will easily outshine Modernia. However, in a 60 FPS, neutral element environment, against a Boss that has no parts but has a core, Modernia will dominate SSakura. But.. the more you start going in favour of SSakura, the closer, if not better, SSakura starts to become! If you add Boss Parts, she gets closer in damage, and if you happen to make that Boss Wind-Weak, she comes even closer! Mix both of them, and at her peak, SSakura should be able to edge out Modernia in DPS! Against Bosses with Adds, she is still a strong pick, but her usability is comparatively lower due to her damage getting because of the smaller raptures present on the screen.
Damage Comparison vs Scarlet Against Solo Bosses:
PVP - SS
S. Sakura is a strong choice in PvP as a main B3. Contrary to her use in PvE as a DoT unit, she will shine in PvP as a Nuker! In the showcase video below, you can see how strong her nuke is. However, this does not show the downside of using her. Her ~4000% nuke happens to be divided into 10 shots over 2.2 seconds, and the targets each individual ~400% part of the nuke in a random order, one by one. An advantage of this is that her nuke cannot be taunted onto one target, and instead moves in a cycle which hits all 5 units. The worst part about this is the fact that her Nuke is divided into 5 units. However, some things that go in favour of SSakura are the facts that her damage that comes from her Skill 2 is of high value and targets the Highest ATK unit of the opponents. If the nuke hits the Highest ATK unit fast, paired with the S2 damage, it is a confirmed kill! Not only that, she scales well with ATK buffs, and also does DoT on the units targeted by her nuke, so anyone left on low HP is also guaranteed a sure fire death!
The major counter to S. Sakura will be Noah, who can completely shut-down Sakura's Nuke, and as a result, shuts the window on any plan you had on beating the opponent team. Scarlet is also a decent opponent against SSakura, since she is AR, and also does damage over time to Scarlet herself. This goes in favour of Scarlet due to her own Skill 2, which has a chance of counterattacks which do deathly damage in PvP.
Sakura is a sustained damage dealer who blights enemies with her trademark Sakura Petals, a DoT debuff that drains HP every second. Sakura automatically applies this debuff to the highest ATK enemy every 30 seconds and also boosts her ATK damage at the same time. Moreover, if she or an ally destroys a boss's part, the duration of this buff and debuff is extended, prolonging the mayhem they bring about.
### What is Damage-Over-Time (DoT) debuff?
Entities afflicted with DoT will take a certain amount of damage every second until the debuff timer runs out. The damage per second is based on the ATK value of the unit inflicting it in real time and updates throughout its duration. Providing damage-enhancing buffs after it is applied does wonders.
DoT won't be increased by Bonus Range or Core Hit (obviously), but CRIT, Full Burst Bonus, Elemental DMG, Attack Damage, ATK Buffs, and Damage Taken all do increase its effectiveness. Since DoT is a debuff, it can therefore be cleansed as well. It works similar to Nihilister's. This information can be useful for Arena if you plan to use her there (or fight against her).
If we take her percentages at face value, she has a decent output, rivalling that of Modernia but slightly lower if enemy presents favorable conditions to Modernia (core, etc). Most of her damage comes from Skill 2 and Burst Skill. This means she is somewhat bursty, and her damage would see a significant jump after using Burst Skill. However, it is not as apparent as that from Red Hood or Alice. Her Skill 2 will deal continuous damage as long as the team continues to break parts, while her Burst Skill is not as reliant.
If her S2 triggers off CD when the remaining buff/debuff duration is still above 15s, then the original duration will be kept. Otherwise, the duration is restored to 15 seconds.
However, wielding an Assault Rifle, Sakura may not be the best when it comes to breaking miniature parts herself. Against Mother Whale's, for example, she would have a hard time destroying them. On the other hand, cracking gigantic parts like Alteisen's in close range would be effortless. Hence, she may require another DPS to help destroy parts faster.
Sakura's kit boasts beefy numbers. Huge multipliers. Her Burst Skill alone deals a total of X,XXX% of caster's ATK as damage in total against single targets, which is incredibly high! This also does not factor in her Skill 2, which deals a lot of continuous damage. Her percentages are indeed very promising!
Since Sakura's kit boasts astronomical numbers yet lacks ATK buffs, she scales well with them, allowing her performance to skyrocket in the right setup. That means, when obtaining OL or pairing supports, prioritize ATK buffs more than anything else. You also ideally want ATK buffs that are long so that you will not have to worry about S2 timings. Another good thing about her is that she is not reliant on Max Ammo as most DPS are (everything is tied to part breaking).
Elemental DMG is a nice sidegrade to ATK and may be a better pick when preparing her for Iron bosses (aka Golden Kraken, next Solo Raid).
Just from the kits themselves, we would highly recommend pairing her with Rosanna: Chic Ocean. She offers consistent ATK buffs and Parts Damage boost that would help Sakura trigger her S2 more often. If no Rosanna, you can explore other options like Tia & Naga or Blanc & Noir. The best option is obviously Crown. However, using Rosanna: Chic Ocean offers a plethora of advantages, such as making the other supports available for other units. A unit should not be compared with the most optimal supports but rather the support pairings they usually get.
Although Rosanna is a universal support that boasts a terrific Damage Taken debuff, her Sustained Damage buffs would only work with one meta DPS, and that is Sakura herself. Tell us how to make a somewhat inseparable duo without making it an obvious one.
### About "Attacks sequentially"
- Attacks the target(s) sequentially for the designated number of attacks.
- If the number of targets is fewer than the number of attacks, the remaining attacks will be directed at the first target again.
- Targets in Taunt or Attract status won't be attacked repeatedly because of their status. Instead, they only change the order of attacks.
It is also important to understand that her Burst Skill deals damage sequentially to a random enemy 10 times within 2.2s (0.22s/hit). This means it reapplies DoT from time to time, increasing its debuff stacks, maxing at 10. As it is stack-based, and stacks are NOT independent, her Burst Skill's damage will be significantly higher against single targets. This is because, if there are multiple enemies, her Burst Skill will instead cycle through enemies before going back to the primary target. Timers are also refreshed, meaning that her DoT actually lasts around 12.2s as the final refresh occurs at 2.2s after Full Burst begins. If there are less than 10 enemy units, let's say 5 units in PvP, the nuke attacks them in a random order, and then the units are hit again in the same order as before.
If you notice, the peak damage of her Burst Skill is not right after Full Burst begins but is slightly delayed as stacks need to be built up. This results in the theoretical assumption that shorter buffs like Liter's would be less efficient on Sakura. A similar complication also affects her S2. Sakura is better coupled with supports that give long-lasting buffs.
Investments
Gear Investments
Sakura's OL requirements are relatively simple. Just ATK and Elemental DMG (staple for DPS). Nothing else. She is not reliant on Max Ammo. However, we discovered her DoT can CRIT, so CRIT lines are passable.
Essential: -
Ideal: 4× Elemental DMG and 4× ATK
Passable: 4× CRIT Rate, 4× CRIT DMG
Priority: Medium
Skill Investments
Skill 1: 5-7
At level 5, breaking 2 parts every 30 seconds can provide permanent uptime for her Skill 2. However, you may upgrade it to level 7 for the minor extra sustained damage buff, as well as to maximize uptime when there is only 1 part break every 30 seconds.
Skill 2: 7~10
Skill 2 is where most of her DPS output comes from. Eventually max out this skill to take full benefit of the Attack Damage Buff, as well as the DoT skill.
Burst Skill: 7~10
Her Burst Skill is also a major chunk of her damage output. It especially comes into play in PvP. Apart from that, this skill also has a DoT, which adds substantial damage. Eventually max out this skill as well to take full advantage of her skills.
Cube Investments
S. Sakura does not particularly require any cube. Any generic cube works on her, but Bastion will allow her to shoot more bullets over 3 minutes. Despite that, it is recommended to use the highest level cube available for the ATK (and Elemental DMG) bonus.
Review
Pros
Scales really well with ATK buffs.
Stable DPS yet packs a lot of punch during her own Burst.
Consistent Attack Damage buff to pair with her S2 activation.
Nuke and follow-up DoT can be effectively used in PvP, and are a strong source of damage in PvE as well.
Competes for a spot in Solo Raids against Wind Weak Bosses.
Somehow, she is even cuter than before!
Cons
Against multiple enemies, her Burst's effectiveness falls off.
No innate ATK buff.
Since she wields AR, she may not be able to effectively hit parts against far enemies, and hence her self Parts Damage buff will be a waste.
If neither Boss Parts and Element are in her favor, she may not be able to compete in damage against Meta B3 in Raids, but we shall see later after Rosanna is here.
In PvP, her DoT and AR weapon type put her at a disadvantage against Scarlet+Jackal teams, since she can be highly susceptible to dying against Scarlet's Skill 2.
Ratings
C
Story
B
Bossing
B
PVP
Investment Tips
Skill Investment
Here's the explanation for all the numbers and colors used in the guide:
10/5/7 means upgrading Skill 1 to lvl 10, Skill 2 to lvl 5, and Burst Skill to lvl 7,
Yellow means the immediate investment when u get the unit. There are 3 reasons for this:
If the unit is Meta or High Priority, it will have a starting investment of more than 1/1/1 (such as 4/4/4) depending on what the unit provides.
If the unit is Medium or Low Priority, 1/1/1 will be mentioned, meaning no immediate investment is required, and you can invest in this character if you need to use it according to the priority listed.
If we deem that a unit does not have usable skills to be meta for any gamemode, no investment will be mentioned.
Blue means minimum investment to take advantage of the Nikke's skills. There are 2 reasons for this:
Sometimes, minimum investments are breakpoints such as for Noir or SAnis.
Sometimes, minimum investments are just the ideal way to progress to upgrade that unit, before moving on to Recommended and High.
Red means recommended investment for F2P players,
Purple means maximum recommended investment, in order to get the best out of the unit. You should only try to reach these investments if you have a surplus of Skill Books leftover.
More info:
The skill investment list below features a lot of Level 4 and 7 because they are easier to understand. Any higher levels will cost a new type of resource.
However, you may choose to upgrade to Level 5 if you need a stronger effect instead of 4, as the increase in Blue Manual cost from Level 4 to 5 is still low. The leap only starts from Level 6 onward.
There is also a leap from Level 3 to 4, so if you want to save a tiny bit of Blue Manuals, then leave at 3 instead of 4.
This Overload (OL) Recommendations and Priority guide unravels in detail everything you need about a character in terms of priority, overload targets (effects), and order of acquisition, alongside some notes to explain our thinking process.
For OL targets and order of acquisition, we decided to divide the target effects into several categories.
Essential: With all gear combined, your unit must have the roll(s) prescribed as a minimum requirement. Example: Charge Speed on Alice. You cannot compromise on these rolls.
Ideal: These rolls will improve your unit's performance significantly. Aim for 2 lines of Essential/Ideal per gear for maximum performance and the best Return on Investment (ROI). If you get 3, you are lucky. You can choose to only have 1 as well to save materials. Example: Elemental Damage on Scarlet.
Passable: Low-priority line that has either limited value or the impact is not as strong as other rolls. Should this show up as a bonus together with a better line, you can choose to keep them. Example: Charge Speed on Red Hood.
Overload effects are ordered by importance from Left to Right, which means anything on the left provides more value than the right. Effects that belong to the same group generate too similar an impact to make a difference (and are sometimes interchangeable). Try to follow this order as faithfully as possible for maximum mileage.
Additional tips:
Priority (PvE/PvP) isn't necessarily lower than Priority (Universal), which has no tag/label. It just indicates that this unit performs only in select types of content.
If a suggested effect has the number ×2 next to it, that means you should get the effect on at least 2 gear. The same idea applies to other numbers.
Focus on obtaining Essential(s) then you can start worrying about optimizing your rolls. Units require these to function, and the impact is too massive to ignore.
If a unit has no Essential(s), that means their performance is not that dependent on OL, but they can still benefit from good effects.
Remember that this is just a recommendation list, and attaining perfection is impossible. You will have to make some compromise, pick whichever rolls you desire the most, and conserve as much material as possible.
Tertiary DPS against Wind-weak bosses. Not the most meta anymore but is still used in SR.
PVP Priority
6/10
PVP Comment
One of the better PvP buffers. May want extra ATK stat to confirm kills.
Cube Investment
PVE
Bastion Cube
Resilience Cube
Destruction Cube
PVP
Bastion Cube
Resilience Cube
Wingman Cube
S. Sakura does not particularly require any cube. Any generic cube works on her, but Bastion will allow her to shoot more bullets over 3 minutes. Despite that, it is recommended to use the highest level cube available for the ATK (and Elemental DMG) bonus.
Teams
Teams
Team 118
The Bunny Duo
Mode: Bossing || Element: All
Characters
About the team
While Tia's Attack Damage buff and Naga's ATK buff are highly appreciated, Tia and Naga are Core-hit buffers and are better suited to units that hit the Core more often. However, S. Sakura's passive damage comes from skills instead of Core hits. On the other hand, Blanc and Noir help S. Sakura the same as they would benefit any other unit. Maxwell boosts S. Sakura's output, while Modernia in general performs exceptionally well in the bunny team due to Noir's Max Ammo buffs.
Substitutions
-
Team 119
Partners in Wind
Mode: Union / Solo Raids || Element: Wind
Characters
About the team
This team was seen being used as a meta team for Wind Weak Solo Raids. Red Hood acts as a B1 unit for one of Sakura or Mana, whoever is dealing more damage.
Substitutions
-
Team 120
Making Use of DoT with Stall (3RL)
Mode: PVP || Element: All
Characters
ClipSG
About the team
Noir, Soda: Twinkling Bunny, and Drake are the best choices for Clip SG here. Hits less harder as the previous team but you save some critical resources. Again, will fare well against Noah-less teams, but otherwise may struggle.