


Quency: Escape Queen

The charm of a fleeting life is the adrenaline-pumping dangers within. That is probably what the legendary escape artist Quency would say when she fled ShiftUp's confinement to broadcast what SMGs are truly capable of. Quency: Escape Queen is a damage dealer who can deal distributed damage and continuous damage through basic attacks. Wielding dual SMGs, she can speedily vaporize enemies and accumulate stacks, unlocking a cache of practical buffs alongside ATK & Hit Rate. Her Burst Skill allows her to strengthen herself further and perform a screenwipe, annihilating enemies outside range.
Can you give a brief summary about this unit?
Quency: Escape Queen (abbreviated hereafter as QuencyEQ) is a competitive damage dealer from the Water camp that can vie with fabled damage dealers from the garrison. She is not Alice-level broken, but she should be able to healthily compete with the likes of XLud and Modernia in terms of damage, but there is bound to be some variability depending on the stage design & features. Against single targets in close range, the 30% damage distance bonus will take her DPS up a notch, but this is rarely the case in most content. She suffers from inconsistency at long ranges even with Hit Rate buff as she needs to hit shots to stack buffs. Missing shots can be detrimental. She has a screenwipe to help manage unreachable targets, however. Overall, her DPS in a conducive environment seems very promising, at least mathematically.
On the topic of synergy, at the time of writing, QuencyEQ synergizes well with most support units. ATK buffs are diluted because she has many but still effective. Stack refreshers are not urgent because the impact is minimal (since stacks last too short for timings to align). Honorable mention to SMary for being the only unit providing Elemental DMG buff.
As regards investments, she is somewhat investment-heavy as her S2 should be maxed as soon as possible to minimize inconsistency (missing shots; missing core shots). It also stores all of her ATK buffs, which are crucial to providing damage and counterbalancing stat penalty. She also needs a highly leveled Cube (at least Level 7 of Resilience/Bastion) and a properly grounded OL, consisting of 1~2× Hit Rate & 1~2× Max Ammo. Depending on the theme of the comp she is in, this ruleset may change.
When it comes to usage, she will definitely be used inWater-Weak Raids and can be used in Campaign, PvP, and Missilis Tower. Her solo performance is incredible, but the lack of special connection with any support is the problem. Couples such as Ein + SAnis make a great combo together, and the Asuka + Rei + Modernia triad will always be deadly. Meanwhile, QuencyEQ does not have an exclusive support yet, unless Miranda counts. Even then, she is still one of the best units against Harvester in Anomaly Interception, making her worth investing in if you need T9M gear.
Oh, and one more thing, she is MANUAL-HEAVY and absolutely not AUTO-FRIENDLY. This is because somehow the game codes it so that, if AUTO-AIM/FIRE is turned on, everyone suddenly loses their eyesight and becomes more inaccurate.
Should I pull this unit?
Her masterful manipulation ability has beguiled us into pulling her, so you should too. In all honesty, she is worth pulling, but anniversary is around the corner, so you will be the one making decision this time, not us. Quency being Water is a dependable sidekick for clearing content that is Water-weak since we do not have a lot of good Water units at the moment. That includes current and future Raids as well as Harvester AI. She also holds some authority in Campaign, PvP, and Missilis Tower, though not as much as the other recently released units.
Now, Anniversary Units are likely to be more broken, so you should always prioritize them first if you lack funds to get both. However, this also comes with a risk of you not having access to QuencyEQ for long and missing any potential synergy with future Nikke(s).
We do not really recommend using Golden Mileage Ticket(s) nor obtaining Dupe(s) for units who can be acquired through Ordinary Recruit (except if it is overbearing like Alice), but that is up to you. If you are a competitive Solo Raid player and are concerned about being handicapped in future raids, consider getting one copy.
Kit Analysis
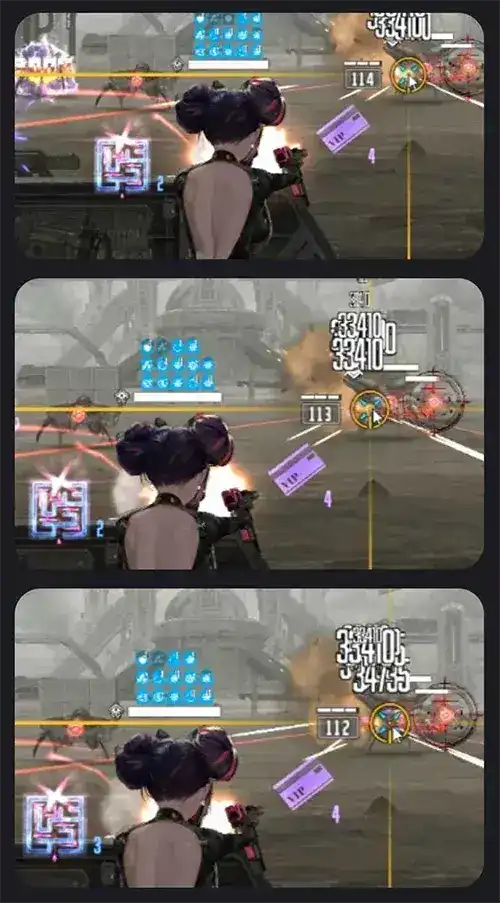
QuencyEQ is a dual-SMG B3 who fires 40 bullets every second, dealing 202.4% of final ATK as damage and consuming 20 ammo in total. Her basic attack ratio is not high but is considerably higher than the average AR and should be equal to most other SMGs. It has a higher core multiplier of 2.5× as opposed to the usual 2× on most non-SMG units. Basic attacks constitute 76% of her total damage (68% if without Core), and therefore she is heavily reliant on hitting basic attacks. It is also possible to run her as an off-burst unit.
She is also MANUAL-HEAVY and not AUTO-FRIENDLY. Turning off AUTO-AIM/FIRE will actually increase the accuracy of every unit in your team (except MG & RL). While this has been present for some time, it is not widely known, and it might just be the cause of you not hitting Core Shots with RH & Alice. With the release of this unit, we would like to remind you that this mechanic (or rather limitation) exists.
Is the Route Secure?
■ Activates only when Explore Route Stage 1 is fully stacked. Affects self.
Distributed Damage ▲ 49.58% continuously.
■ Activates only when Explore Route Stage 2 is fully stacked. Affects self.
Damage dealt when attacking core ▲ 25.25% continuously.
■ Activates only when Explore Route Stage 3 is fully stacked. Affects self.
Critical Rate ▲ 16.73% continuously.
This skill becomes more powerful as she enters more advanced stages with her Skill 2, which can be done via landing basic attacks and accumulating stacks.
- Upon reaching maximum stacks of Stage 1, she gains 49.58% Distributed Damage buff, which effectively increases her Burst Skill damage by the same value. Always achieve this milestone first before using Burst Skill. It is easy to maintain and can be considered permanent if you keep on shooting.
- Upon reaching maximum stacks of Stage 2, she gains an extra 0.25× Core Damage Multiplier. This does not make her deal 25% more damage against cores; rather, it increases her Core Damage Multiplier from 2.5× to 2.75×, which is diluted by Damage Distance, Full Burst, and CRIT Multipliers.
- Upon reaching maximum stacks of Stage 3, she gains 16.73% Critical Rate. This is somewhat contradictory to Core Damage Multiplier because CRIT belongs in the same category as them and is diluted. However, against bosses without core, the impact is substantial. It also increases her overall Burst Skill damage (which can CRIT but cannot core-hit).
Exploring the Route Together
■ Activates after landing 2 normal attack(s). Effects self. Effects in each phase vary. Previous effects trigger repeatedly.
■ Stage 1: Affects self.
Hit Rate ▲ 1.36%, stacks up to 10 time(s) and lasts for 2 sec.
ATK ▲ 2.45%, stacks up to 10 time(s) and lasts for 2 sec.
■ Stage 2: Activates when Explore Route Stage 1 is fully stacked. Affects self.
Hit Rate ▲ 2.71%, stacks up to 10 time(s) and lasts for 1 sec.
ATK ▲ 4.9%, stacks up to 10 time(s) and lasts for 1 sec.
■ Stage 3: Activates when Explore Route Stage 2 is fully stocked. Affects self.
Hit Rate ▲ 4.08%, stacks up to 5 time(s) and lasts for 0.5 sec.
ATK ▲ 7.36%, stacks up to 5 time(s) and lasts for 0.5 sec.
The activator of Skill 1 and most susceptible to how much Reload Speed buff QuencyEQ possesses. Basically, every time QuencyEQ expends 2 ammo or launches 4 basic attack instances, she gains one stack of Stage 1, Stage 2, and Stage 3 buffs. Each Stage offers a different buff intensity, up to a grand total of 61.1% Hit Rate + 110.3% ATK combined. Higher stage buffs can only be instated and stacked if the previous Stage buff has already been maxed.

- Stage 1: Max stacks (10) grant a total of 13.6% Hit Rate and 24.5% ATK. Stacks last 2 seconds. They are easy to maintain and can be considered permanent if QuencyEQ can keep shooting at a valid target, even without any Cube and outside Burst Skill buffs.
- Stage 2: Max stacks (10) grant a total of 27.1% Hit Rate and 49% ATK. Stacks last 1 second. These are impossible to maintain without >47% Reload Speed buff (validated for 50.43%+). Crown + Resilience should be plenty and leave ample room for error.
- Stage 3: Max stacks (5) grant a total of 20.4% Hit Rate and 36.8% ATK. Stacks last 0.5 seconds. These are impossible to maintain without >97% Reload Speed buff (validated for 97.56%+). You can achieve 97.56% Reload Speed with Crown S2 Level 10, Resilience Level 7+, and Quency Burst Level 8.
Reload Speed Formula
At 60 FPS, most units take 11 frames × 2 + Reload Time to reload their weapon and fire their next shot. This is very consistent across multiple units and measured by examining the frametime of the last ammo shot before reload and the frametime of the first ammo shot after reload. Additionally, if >109% Reload Speed threshold is reached, 11 frames will be deducted from this length.
To optimize the effect longevity of this skill, one must reload less or prevent the expiration of stacks. To reload less, one needs sufficient Max Ammo to last until a breakpoint in time and amount is reached. To prevent the expiration of stacks, one needs Resilience + Reload Speed buffers in team. Besides that, this amount of Hit Rate provided by this skill alone is still not enough to achieve line-shot or comfortable shooting accuracy (even with Auto-Aim/Fire turned off). We will discuss potential solutions in detail in Gear Investments section.
It takes 46 ammo (or 2.3 seconds) to reach maximum stacks of Stage 3 from zero. Whenever you trigger the final stack of the previous stage, you will also trigger the first stack of the next stage.
The Great Thief & The Elusive Escapist
■ Affects self.
Attack Damage ▲ 57.08% for 10 sec.
Reloading Speed ▲ 25.87% for 10 sec.
■ Affects all enemies.
Deals 1736.31% of final ATK as Distributed Damage.
Quency grants herself a large amount of ATK DMG and Reload Speed for 10s. Huge damage improvement and potentially allows the maintenance of Stage 2 or Stage 3 stacks (depending on Cube & Support Units). These effects take place before the nuke happens, so the nuke benefits from them.
The wipe deals 1736.31% Distributed Damage to all enemies on the field. It is buffed by Distributed Damage▲ and Critical Rate▲ from S1, as well as the ATK DMG▲ from this skill. It can CRIT but cannot core-hit. Since the damage is divided among all enemies, the more enemies there are, the less damage each takes. Problem comes when dealing with too many tanky mobs in campaign. If damage is divided too much, no one will be killed.
They Are Multiplicative!
Distributed Damage▲ and ATK DMG▲ are multiplicative as the former belongs in the Damage Debuff category (Damage Taken, etc), while the other belongs in the Damage Buff category (True DMG, Pierce DMG, etc). In other words, her Burst Skill deals a perceived total of ~4080% of final ATK as Distributed Damage.
Against single targets, we calculated that Burst Skill constitutes 24% and 32% of the whole damage dealt to single-target enemies with and without core respectively.
Usage Analysis and Tier List
Campaign (LD) - S | Campaign (HD) - S
A generally good unit for pushing low-deficit campaign but may not be beginner-friendly due to OL and skill dependency. If you are a casual player who likes to sleep on Campaign, you will find QuencyEQ amazing to use. She has Hit Rate + ATK, which allows her to deal with enemies in close and medium range (even far with the correct OL) and wipe the screen effortlessly with her Burst Skill. Do note that she needs to land her shots to stack or maintain S2. A good all-in-one package with an edge in Water-weak stages.
Her performance falters slightly against high-deficit content due to her Burst Skill being Distributed Damage, which may or may not be enough to clear the screen. She is still a useful unit and can help with clearing Water-weak stages (with a similar outlook to XLud).
Bossing - S
Her primary category. QuencyEQ is designed to humiliate Water-weak bosses since so far we only have XLud in our arsenal. Against bosses without adds, QuencyEQ's Burst Skill damage is completely focused on one boss, contributing a massive amount of damage. Against bosses with adds, her Burst Skill will help deal with critters that spawn alongside the boss at the cost of overall ST damage toward the boss. A few bosses that she has proven to shine against include Harvester in Anomaly Interception and very likely the currently happening Land Eater SR.
Bosses also usually have large bodies, have more HP, and do not jump around a lot, making it easier for QuencyEQ to stack her S2 and achieve her full potential. You can also previously decide whether to include QuencyEQ in your comps depending on the element of the boss, the distance, as well as the availability of a persistent core. She may not be a staple in every raid nor an everlasting unit in your best five squads, but the ability to deploy her when it is favorable is a great perk. If there will be Water-specific buffers in the future, she might as well re-enter the meta.
PVP - SS
Tier List Revamp
With the advent of Champion Arena, our PvP tier list is currently pending a rework, which will be published when more information about Champion Arena is announced. We will be shifting our foundations to also involve Champion Arena.
Her role in PvP is a Wiper with Follow-Up Damage, similar to Maiden, Rei, PrivM, BSoda, Ein, and the likes of them. Her Burst Skill, if Stage 1 of S2 is fully stacked, deals a total of ~4080% Distributed Damage to all enemies (around ~816% per enemy assuming everyone is alive). This only takes the ATK DMG▲ and Distributed Damage▲ into account, not yet the ATK▲. This is quite big, but it is also counterable by Taunters + Immune (the same way as SBS is countered) who can activate their effects before her Nuke.
Additionally, as a Water Unit, she is also more vulnerable to Z.E.U.S. attacks, and coincidentally, most meta PvP units are Z.E.U.S., so good luck resisting those. Meanwhile, there are not many H.S.T.A. units she can bully.
Investments
Gear Investments
Here we are—the most complicated section of this guide. QuencyEQ is very restrictive when it comes to OL, and you may have to spend a lot of resources perfecting her.
- Hit Rate: QuencyEQ's kit has many Hit Rate buffs, but it is just a little short of reaching our target accuracy. While theoretically line-shot is achieved after 2-3× Hit Rate OL, we discovered that 1-3× Hit Rate is serviceable for everything. Depending on their values, you can get away with one high-level Hit Rate. Make sure to turn off AUTO-AIM/FIRE. Save the other slots for more impactful lines such as Elemental DMG or ATK.
- Max Ammo: Generally, for Resilience comps, one is enough, and for Bastion comps, two is minimum. However, in Reload Speed comps, when you are using characters like Privaty who reduce the Max Ammo of your team, you might as well play it safe by getting 2× Max Ammo to minimize chokes. Not only that, it may also help you last till the next Reload Speed buff (or at least cut down the number of reloads in between). Consider how long the team takes to fully recharge Burst Bar!
- Attack: Most evident when it comes to PVP. Although QuencyEQ has a lot of ATK herself already (and by the time she uses Burst Skill, she will have obtained max stacks of S2 unless she dies), a little more ATK from OL will help push from "almost wiped" to "completely wiped". Without Damage Reduction from Dolls, Quency needs more than 27% ATK from OL to secure kills when paired with one buffer like Blanc, RH, or Crown/Tia.
- Essential: 1-2× Hit Rate, 1-2× Max Ammo
- Ideal: 4× Elemental DMG, 4× ATK, 1× Max Ammo
- Passable: 1-2× CRIT DMG, 1-2× CRIT Rate, 1× Hit Rate, 1× Ammo
- Priority: High
Skill Investments
QuencyEQ is not only OL-dependent but also skill-investment heavy.
- Skill 1: 5~10
- Contains practical buffs that enhance her basic attacks and Burst Skill damage. To save Blue Books, Level 5 is a good compromise.
- Skill 2: 10
- Higher then regular scaling at 1.71× as opposed to 1.69×. Her only source of ATK buffs and her core skill. Maximize ASAP.
- Burst Skill: 8~10
- Increases her damage temporarily when activated. Levels are important for deciding whether her screenwipe will kill anyone and/or she can reload without losing S2 stacks. As mentioned in Kit Analysis, the minimum breakpoint to achieve no loss of Stage 3 buff with Crown & Resilience is Level 8. Upgrade further for more damage.
Suggested Progression Path
PVE investment
4/4/4 → 4/7/7 → 7/10/8 (→ 10/10/10)
PVP investment
4/4/4 → 7/7/7 → 10/10/10
Priority
High
Cube Investments


Depending on the comps used and OL, either Resilience or Bastion Level 7+ will be better in your situation. You might as well test both to see which one feels more comfortable and deals more damage. Resilience revolves around "reload as fast as possible to avoid losing stacks", whereas Bastion revolves around "avoid reloading so that you can shoot more shots with Stage 2 & 3 stacks".
- For Resilience specifically: you will need at least Max Ammo ×1 but are suggested Max Ammo ×2 if you plan to use Privaty with her. You would want to avoid reloading outside Reload Speed buffs (which are usually active only during Full Burst + a short duration afterward [Crown]). If you have to, make sure to limit its occurrences. A good start is by reloading at the end of Full Burst(s), but this does come at a little bit of damage loss.
- For Bastion specifically: you will need Max Ammo ×2 or more. This is easier to run as you do not need to worry about timings and only have to shoot as much as possible to secure the highest distribution for Stage 3 shots. Pair with Noir or Bunny Alice, and you might as well have "infinite ammo".
PvE Team Compositions
Team #1: Quencyyy BEAMMMMMM!!!
Burst 1
Burst 2
Burst 3
Burst 3
Burst 3
This team focuses on overcharging QuencyEQ with lots of Max Ammo and Hit Rate from Noir & Modernia (as well as Liter). With some investments and a good manual gameplay, QuencyEQ's shots will turn into a laser. Note that BunnyAlice here is a troll pick and serves only to complete the true infinite ammo build. QuencyEQ uses Bastion in this team.
Team #2: Wo'ah Water Woteh
Burst 1
Burst 2
Burst 3
Burst 3
Burst 3
This team utilizes SMary's Elemental DMG buff to make QEQ more devastating, as well as her healing to keep the team healthy. The last two units are FLEX and can be other units, damage dealers & buffers alike. We use Phantom and XLud to showcase 3 Water DPS.
Team #3: Squirt Queens
Burst 1
Burst 2
Burst 3
Burst 3
Burst Flex
This team maximizes QEQ's Burst Skill buff, Crown's Reload Speed, and Resilience's effect to achieve perpetual S3 stacks that never drop even when reloading (>97.5% Reload Speed). However, this paradise only lasts when QEQ's Burst Skill effect is active for around 10s. Hence, you need to manage your Max Ammo well and try to only Reload when all these effects are active. Adding Privaty to the team will solve the timing issue as you can achieve Permanent Stacks every Full Burst, but she is not mandatory. The FLEX can be a healer or someone with high burst regen since this team has a slow rotation. In this team, QuencyEQ uses Resilience.
Team #4: HyperQ Miranda™
Burst 1
Burst 2
Burst 3
Burst Flex
Burst Flex
This team uses Miranda's buffs to provide Hit Rate, ATK, and Critical DMG. Against enemies without core, Miranda's effects will become more impactful due to less dilution. Seeing that QEQ has an innate Critical Rate buff but not Critical DMG, they should pair nicely together. This team relies on fishing Burst Skill crits.
Team #5: All Eyes on the Red Rapture Eyes
Burst 1
Burst 2
Burst 3
Burst 1
Burst 3
Against enemies with core, QEQ and XLud can deal massive amounts of damage in this team. It is also very comfortable to run as it has shield & healing. You can also spam-tap Tia for burst gen.
PvP Team Compositions
Godspeed, Lightspeed
Burst 3
Burst 2
Burst 3
Burst 1
Burst 1
This team is derived from the OG RH + Jackal Team but with QuencyEQ as the main DPS. Deliver a very fast wipe with decent follow-up damage. It fears Biscuit as much as Scarlet fears Noah.
Zombie Queen
Burst 2
Burst 3
Burst 1
Burst 3
Burst 3
This is a riskier team since it requires your team must survive till Blanc buff Quency. Rest assure when it happens, QEQ + Emilia + Laplace should wipe the whole team.
Pros & Cons
Pros
- For an SMG, QuencyEQ has a versatile range thanks to self-buff Hit Rate and "screenwipe". She can also hit cores comfortably with proper investments.
- One of the better Water DPS units in game, which is rare, so she has very little competition.
- Has a lot of offensive buffs to sell.
- A screen wiper with follow-up DPS in PvP.
- Constant damage output. Basic attacks weigh similarly to Scarlet's.
Cons
- Due to having a lot of offensive buffs herself, she may not scale well with outside buffs, even if she can synergize with many support units.
- Requires an extreme amount of skill investments to work.
- Requires an extreme amount of Reload Speed to maintain S2's effects.
- Demands properly managed OL.
- In PvP, she fears Biscuit, just like any other Distributed Damage dealer.
- Her pose is doable, but you need to train Yoga for years.