


Projection of Nightmares
Everything you need to know about the Projection of Nightmares Raid!
Last updated: 19/08/2024


Introduction

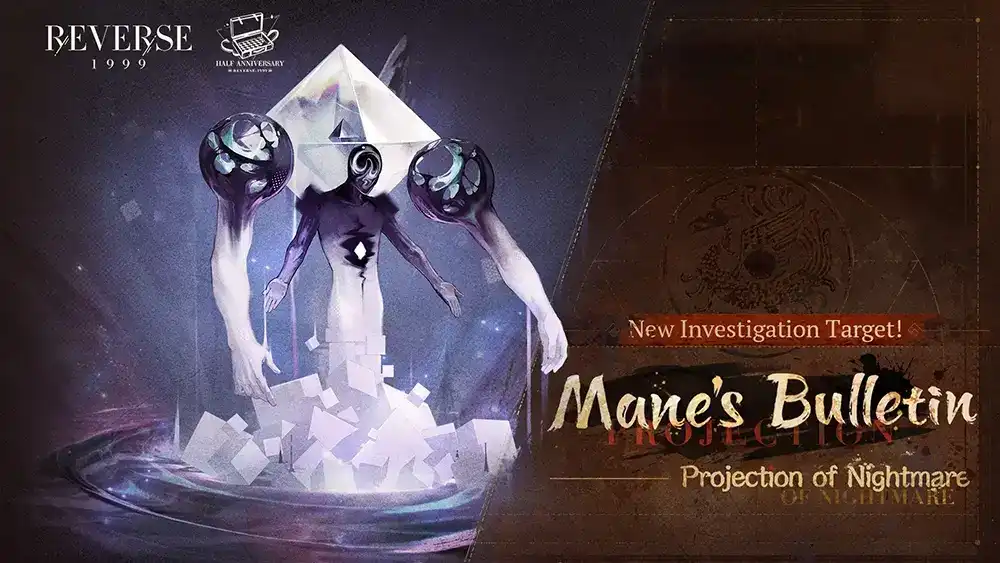
A returning boss from Chapter 4 of the main story, the Symbol of Nightmares (will be referred to as Nightmare going forward) shows up as a multi-limbed counterpart to Gold In The Cave, being an Intelligence Afflatus raid. Strap in and prepare your buffers, you’ll be at their mercy this time around, though the raid itself is extremely simple.
There are a total of 3 types of enemies in this fight:
- The Symbol of Nightmares is the humanoid figure and the ‘main boss’.
- The two limbs named End of Nightmares that we’ll call Left- and Right Arm.
- The pyramid named Root of Nightmares behind it that we’ll call Pyramid.
Field Hazards [Endless Mode]
- At the end of the round, if allies carry 3 types of [Stats Up, [Pos Status] or [Shield] buffs, they gain +1 Moxie and +20% DMG Heal for 2 rounds. If they carry 5 of these buffs they will also purify [Neg Status] debuffs from themselves.
- After taking 2 actions in one round, the ally gains +30% ATK for 3 rounds. After taking 3 actions in 1 round, they gain an additional +30% DMG Dealt for 3 rounds.
- At the end of every 2 rounds, all enemies gain a stack of [Sturdiness]
Mechanics [Endless Mode]
Symbol of Nightmare
- Intense Bond - After an ally on the field dies, enter the [Befouled] state (does not trigger if this unit destroys an ally).
- [Befouled]: DMG Taken Reduction -50% and Critical DEF -30% (removed after losing all HP in the current phase).
- This is Nightmare’s main shtick, focus the limbs one by one to then burst down the current health bar while the boss is under this status.
- Origin of Dreams - When the Pyramid dies, deal Genesis DMG to self (does not trigger if this unit destroys it).
- Another mechanic that encourages a focus on Nightmare’s other targetable parts rather than its main body (until [Befouled] is triggered at least).
- Control Immunity - As is standard with the main body of a boss, the Symbol of Nightmares is immune to [Control] effects.
- Like the other Raid Bosses, when maximum [Eureka] is reached, the boss enters a [Shield] phase for 2 rounds before casting its Ultimate. If the [Shield] is broken, they are knocked out for a round and lose all their [Eureka].
- [Debuff] Card - Deals damage and inflicts +DMG Taken on all enemies for 2 rounds.
- [Buff] Card - Grants +10% Reality/Mental DEF to self. If any of the Arms or the Pyramid are on the field, casts [Weak Spite Amidst Decay], then destroys the remaining Arms and Pyramid to resummon them. If none of them are on the field, resummon them immediately.
- [Weak Spite Amidst Decay]: Deals Reality DMG to all enemies and inflicts 1 stack of [Spite] on them.
- An important card to keep track of that aligns with the basic premise of the fight: to take out the enemies surrounding the main body. You won’t always be able to prevent this which will cause the accumulation of [Spite] that you can get rid of through rigorous buffing and one of the Field/Stage Hazards.
- When [Spite] reaches an amount of stacks it turns into [Spite Entwined], which prevents allies from casting Buff, Debuff, Health or Counter Incantations.
End of Nightmares
- Omen of Awakening - Upon death, grants +1 Moxie to the enemy with the lowest Moxie (does not trigger if destroyed by the Symbol of Nightmares).
- Even further encouragement to be taking out the limbs over (fully) targeting the main body.
Root of Nightmares
- Alive and Serene - At the start of the round, if this unit has 4 Eureka, consume all Eureka and purify [Stats Down] from all allies.
- A simple case of “make sure it doesn’t reach 4 stacks by killing it somewhere before that”. In addition, killing the Pyramid will trigger Origin of Dreams from the main body, dealing additional damage.
- Control Immunity - The fact that the Pyramid specifically has Control Immunity suggests that the Arms do not (unless specified).
Teambuilding
JIU NATIONAL TEAM

Carry
Carry / Support
Support
Sustain
TEAM EXPLANATION
A team centered on the newly-released Jiu Niangzi, who excels at high continuous single-target damage. This set-up is focused around providing Jiu with ample [Liquor] to consume for her attacks while also supporting 37 with FUAs and crit-related debuffs.
- Jiu Niangzi makes a splashing debut onto the scene as a high DPM single-target carry capable of outperforming just about anyone in extended fights. She excels at raids where she is allowed to sit back, relax, and cast, and this raid provides that for her especially. Due to generating her own buffs at Insight 3, she only needs 1-3 extra buffs to trigger the related Field Hazard and the ease at which she can use multiple actions through casting and FUAs will help her gain those extra DMG buffs as well.
- 37 is not a surprising pick here. Though mediocre as a Support, 37 easily feeds off of Jiu Niangzi’s plethora of FUAs to have a generally consistent cycle of her [Supplementary Formula] cast, though if you have her at Portray 0 the pick is a bit more flexible and up to choice. 37 here specifically is quite great due to her FUA hitting Mass, allowing for consistent damage against all of Nightmare’s limbs.
- Is 6 even a question at this point? Great buffing with cleansing that deals with most of the annoying mechanics in the raid alone coupled with the ability to generate [Incantation Empowerment I] for Jiu to deal even more damage. His Insight 3 also buffs all allies at the start of the round meaning he and Jiu together have an easy time proccing the Field Hazard on her. Even based on that alone he’d likely see play here but he also has access to a selection of debuffs and a powerful single-target nuke Ultimate.
- Tooth Fairy does a lot here. While being an amazing defensive anchor combined with 6, she also provides a selection of crit-related debuffs that both 37 and Jiu (due to her high Crit Tech stat) can use.
For other options:
- An-An Lee - Can also be used here, and can SSS the fight if 37 is either unavailable or at low investment for you. Her stances buffs and self-applied [Incantation Empowerment I] allow her to help fill the Field Hazards while dealing decent damage.
- A Knight - Not only is this a rare instance in which A Knight has Afflatus Advantage, his AP-positive playstyle and Mass Attack oriented kit are actually favored in this fight, allowing him to work as both a backup “Carry Support” like 37 or as a Main Carry using someone like An-An Lee over 37.
- Yenisei - As a powerful defensive healer, the further you go into Endless mode, the more valuable she becomes. In addition, her access to [Immunity] and her own [Flow] buff greatly aid in this fight specifically.
PHYSICAL/BEAST TEAM
Carry
Support
Support
Sustain
TEAM EXPLANATION
This team is, in part, focused around Getian, though it supports the two very powerful Physical attackers we have at this moment: Jiu Niangzi and also Spathodea.
- Jiu Niangzi makes a splashing debut onto the scene as a high DPM single-target carry capable of outperforming just about anyone in extended fights. She excels at raids where she is allowed to sit back, relax, and cast, and this raid provides that for her especially. Due to generating her own buffs at Insight 3, she only needs 1-3 extra buffs to trigger the related Field Hazard and the ease at which she can use multiple actions through casting and FUAs will help her gain those extra DMG buffs as well.
- Getian is also a new pick here. His focus on Reality DMG allows him to pair well with the powerful Physical attackers we have at our disposal, providing -Reality DEF on a consistent basis and also an Array that provides a substantial DMG Dealt bonus to specifically Reality DMG teammates. The extra Moxie he gains at the start of combat does limit him somewhat in his team building options but that is easier to resolve in Raids than elsewhere.
- To help Getian get his Ultimate off earlier, a Reality DMG based Support such as An-An Lee is preferred here. In addition to providing buffs, An-An Lee enhances the team’s performance with her AP-generous playstyle and card upgrading mechanics.
- Tooth Fairy does a lot here. While being an amazing defensive anchor, she also provides a selection of crit-related debuffs that both Jiu (due to her high Crit Tech stat) can use.
For other options:
- Spathodea - With easy access to self-buffing Spathodea functions wonderfully as a Carry in this Raid, in addition, she has access to some very fun team building options.
- Desert Flannel - Her use is rare but she actually functions great in this team specifically if you use Spathodea. Her Beast related buffs greatly improve the damage output and the team’s constant self-buffing.
- Medicine Pocket - To complete the Beast quartet, using Medicine Pocket will ensure full use from Desert Flannel while providing solid defensive options for your team. This pick is a but more on the iffy side though, given that Spathodea and Desert Flannel are focused on Crit, but it’s usable.
IDK WHAT THIS IS BUT IT WORKS
Carry
Carry
Support
Sustain
TEAM EXPLANATION
A bit of a curious team that mixes both single-target and Mass damage to burst down the limbs while dealing damage to the main body at the same time. It doesn’t utilize a standard healer, instead relying on each character’s own sustain to make it through.
- Lilya works here as a decent single-target damage dealer that is buffed considerably by Ezra’s steady application of [Discernment], which is the one buff that synergizes perfectly with Lilya’s “high Crit but no Crit conversion” situation by providing extra Crit DMG outright. The primary reason for her use, however, is her ability to self-sustain through her Ultimate’s Leech Rate, which side-steps what would be a major flaw in the team.
- Druvis sees play as a good Mass damage dealer that helps An-An Lee (and herself) stay alive through her [Circle of Life] buff, which provides decent and continuous sustain to the two of them. Beyond that, her consistent Mass damage and decent single-target allows her to help deal with the limbs but also do alright damage to the main body.
- An-An Lee helps facilitate the Field Hazards while keeping herself alive through [Circle of Life] and providing 3-star cards for Tuning or good buffs that help both offensively and defensively. In addition, her stance + [Circle of Life] allows her to easily proc the Long Night Talk psychube to help with damage.
- Ezra Theodore helps mitigate incoming damage through his sizable shields, buffs Crit DMG for Lilya specifically and even though he technically deals self-damage he also does a considerable amount of self-healing through his Insights which allows him to stay alive and keep the team going for a deceptively long time. His debuff card hitting 2 enemies at once also helps with dealing with the limbs.
For other options:
- Tooth Fairy - If you’re too uncomfortable running just Ezra, slotting a proper healer into his position is also a viable option, though it kind of defeats the purpose of the team as when a healer is introduced, the need for self-sustain falls away. In which case you can use other teams to guarantee a higher score more easily.
- Yenisei - As a powerful defensive healer, the further you go into Endless mode, the more valuable she becomes. In addition, her access to [Immunity] and her own [Flow] buff greatly aid in this fight specifically.