4 cost
CRIT DMG > CRIT Rate
3 cost
Havoc DMG > ATK%
3 cost
Havoc DMG
1 cost
ATK%
1 cost
ATK%
Last updated: 24/May/2026
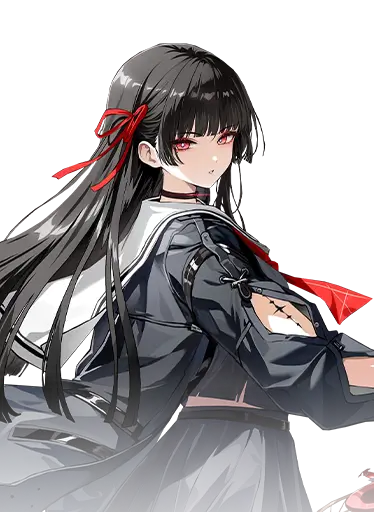
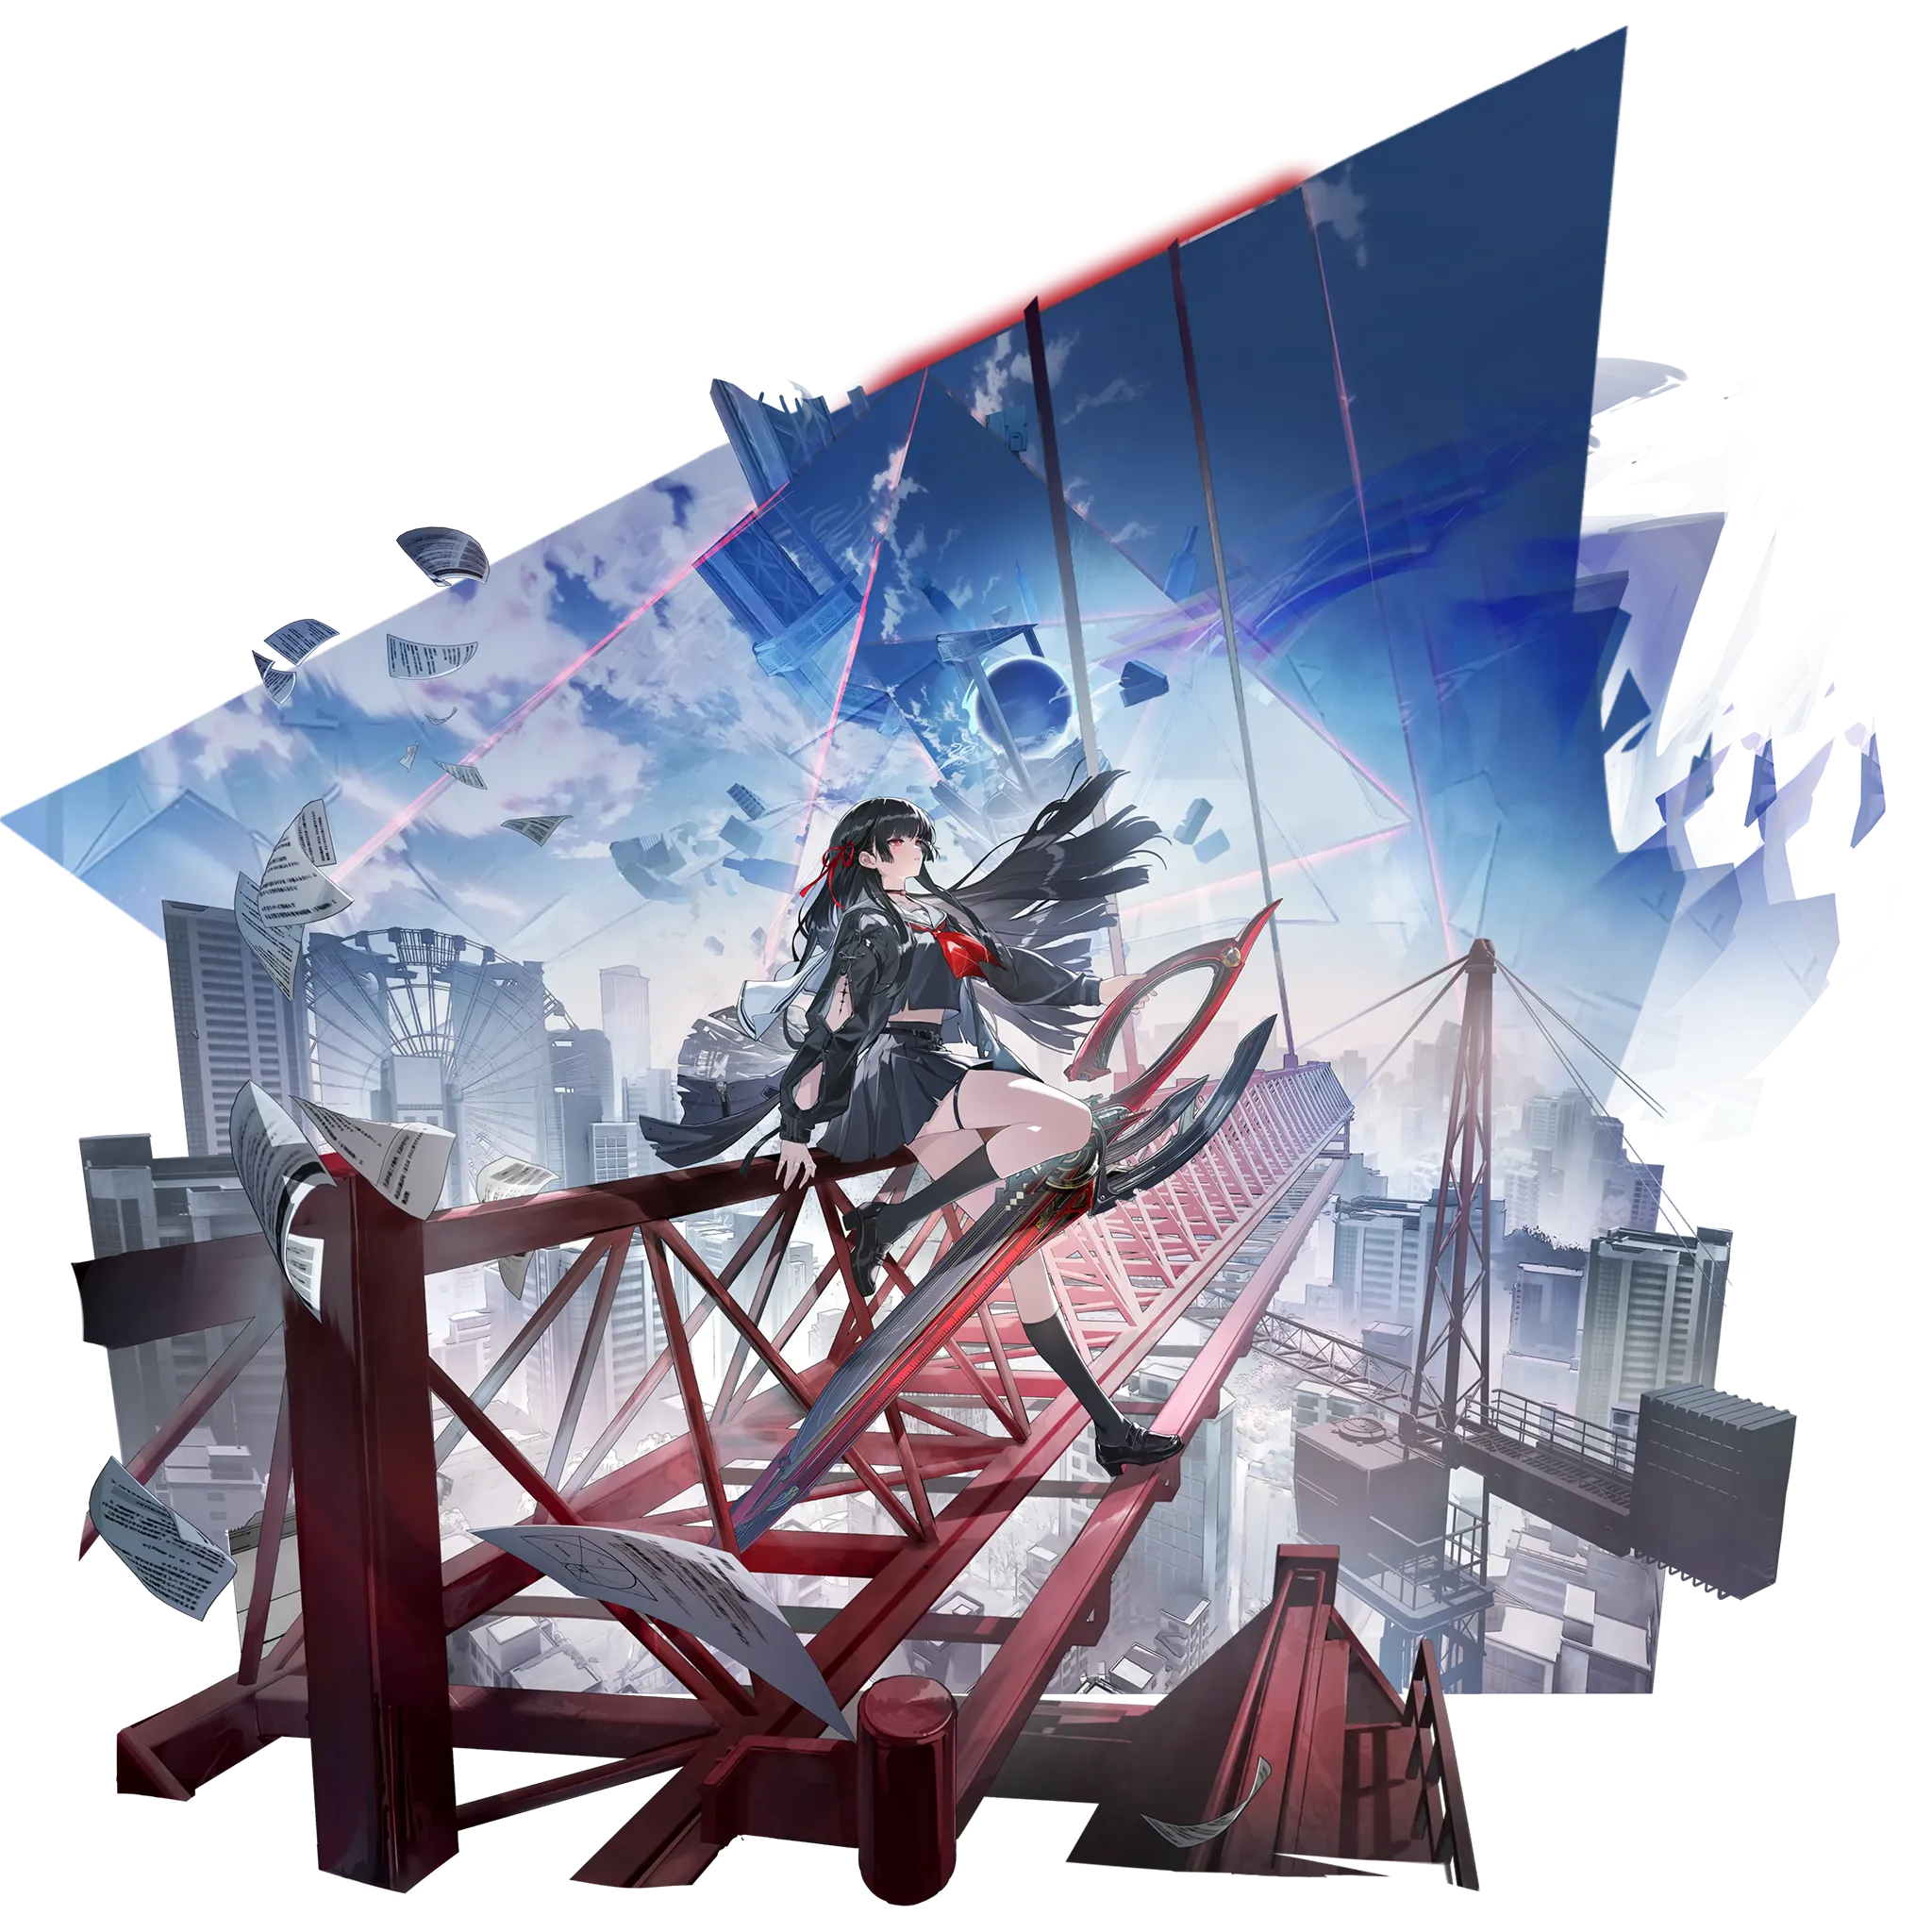
Best guide and build for Chisa from WW (Wuthering Waves). Chisa is a 5★ rarity character from the ![]() Havoc element who uses the Broadblade type weapon.
Havoc element who uses the Broadblade type weapon.
Chisa has at least one video guide available:
Last review update
Patch 2.8
Last major build/calcs update
Patch 2.8
Last profile update*
24/May/2026
*Profile update means smaller edits to echoes, stats, synergies or teams that don't require new calculations.
To learn more about Chisa check the sections below. Use the tabs to quickly switch to the kind of information you're looking for.
Profile
Reign of Silence
Basic Attack
Perform up to 2 consecutive attacks, dealing Havoc DMG.
Press Normal Attack shortly after casting Basic Attack Stage 2 to cast Rending Lunge.
Rending Lunge
Deal Havoc DMG.
Press Normal Attack shortly after casting this skill on the ground to cast Death Snip.
Use Normal Attack shortly after casting this skill in mid-air to cast Hanging Finality.
Death Snip
Open the scissors, dealing Havoc DMG. After a while, the scissors snip, dealing Havoc DMG and restoring HP for all nearby Resonators in the team.
Use Normal Attack during this skill to deal additional Havoc DMG. Use Normal Attack again to immediately snip the target.
The skill DMG is considered Resonance Liberation DMG.
Press Normal Attack shortly after casting Death Snip to cast Thread Withdrawn.
Thread Withdrawn
Deal Havoc DMG.
Can trigger successful Dodges within a certain time after being cast.
Heavy Attack
Leap into the air and consume STA to attack the target, dealing Havoc DMG.
This skill cannot be cast while in Chainsaw Mode.
Perform the following actions within a certain time after casting this skill to cast Hanging Finality:
Press Normal Attack;
Cast Lifethread - Glide and press Normal Attack before landing.
Hold Normal Attack before landing after casting Heavy Attack to cast Heavy Attack - Severed Facet.
Mid-air Attack
Consume STA to perform Plunging Attack, dealing Havoc DMG.
While not in Chainsaw Mode, press Normal Attack within a certain time after casting Mid-air Attack to cast Basic Attack Stage 2.
Heavy Attack - Severed Facet
Deal Havoc DMG.
Use Normal Attack within a certain time after casting Heavy Attack - Severed Facet to cast Hanging Finality.
If interrupted, Heavy Attack - Severed Facet can be cast again by holding Normal Attack before landing. This effect can be triggered once only before landing.
Hanging Finality
Consume STA to perform Plunging Attack, dealing Havoc DMG.
Press Normal Attack shortly after casting this skill on the ground to cast Death Snip.
Dodge Counter
Press Normal Attack right after a successful Dodge to attack the target, dealing Havoc DMG.
Press Normal Attack shortly after casting this skill to cast Rending Lunge.
Dodge Counter - Eye of Unraveling: Retraction
Hold Dodge after a successful Dodge on the ground to cast Dodge Counter - Eye of Unraveling: Retraction to attack and Stagnate the target, dealing Havoc DMG.
While not in Chainsaw Mode, after casting this skill, Press Normal Attack on the ground or use Normal Attack in mid-air to cast Rending Lunge. This effect is removed when Chisa enters Chainsaw Mode.
While in Chainsaw Mode, press Normal Attack shortly after casting this skill to cast Sawring - Blitz Stage 3.
Fractured Composition
Eye of Unraveling
Stagnate and deal Havoc DMG.
While not in Chainsaw Mode, after casting this skill, press Normal Attack on the ground or use Normal Attack in mid-air to cast Rending Lunge. This effect is removed when Chisa enters Chainsaw Mode.
While in Chainsaw Mode and on the ground, press Normal Attack shortly after casting this skill to cast Sawring - Blitz Stage 2.
Can be cast in mid-air.
Serrated Loop
While on the ground and Ring of Chainsaw is full, Resonance Skill is replaced with Serrated Loop. Stagnate targets, and deal Havoc DMG and pull in nearby targets.
Casting this skill sends Chisa into Chainsaw Mode and replaces Resonance Skill with Eye of Unraveling.
Press Normal Attack shortly after casting this skill to cast Sawring - Blitz Stage 2.
Hold Resonance Skill while casting this skill to continuously attack and pull in nearby targets. Release the Resonance Skill button in the duration or keep holding it for a certain period of time to cast Sawring - Blitz Stage 1.
Moment of Nihility
Deal Havoc DMG and recover HP for all nearby Resonators in the team.
Casting this skill sends Chisa into Woven Myriad - Convergence for 15s.
While not in Chainsaw Mode, press Normal Attack shortly after casting this skill to cast Basic Attack Stage 2.
Can be cast in mid-air close to the ground.
Woven Myriad - Convergence
The DMG Multipliers of Sawring - Blitz, Chainsaw Mode - Dodge Counter, and Sawring - Eradication are increased by 120%.
The bonus DMG Multiplier for Sawring - Eradication granted by Sawring- Blitz and Chainsaw Mode - Dodge Counter when Ring of Chainsaw is consumed additionally increases by 120%.
Casting Sawring - Eradication ends Woven Myriad - Convergence.
Sight of Unraveling - Oblivion
Unseen Snare
Chisa inflicts Unseen Snare on the target for 30s in the following 4 ways:
Hitting a target with Resonance Skill.
Hitting a target within a certain period of time after casting Serrated Loop.
Hitting a target with Dodge Counter - Eye of Unraveling: Retraction.
Locking on to a target.
When targets marked by Unseen Snare take direct damage from Resonators, Chisa inflicts 1 stack of Havoc Bane on them. This effect can be triggered up to once every 2s.
Thread of Bane
When dealing damage to targets affected by Unseen Snare, ignore 18% of their DEF.
Chainsaw Mode
While in Chainsaw Mode, Chisa unlocks Sawring - Blitz, Sawring - Eradication, Chainsaw Mode - Dodge Counter.
Sawring - Blitz and Chainsaw Mode - Dodge Counter consume Ring of Chainsaw on hit.
Sawring - Blitz
Sawring - Blitz chains up to 3 consecutive attacks, dealing Havoc DMG.
Press Normal Attack to start the combo from Sawring - Blitz Stage 1. Hold Normal Attack to start from Sawring - Blitz Stage 2.
Hold Normal Attack while casting Sawring - Blitz Stage 2 to continuously attack the target. Sawring - Blitz Stage 2 is automatically followed by Sawring - Blitz Stage 3.
While casting Sawring - Blitz Stage 2, release the Normal Attack button or Dodge without directional input to automatically cast Sawring - Blitz Stage 2: Discordance, dealing Havoc DMG. Shortly after casting Sawring - Blitz Stage 2: Discordance, successful Dodges can be triggered.
Press Normal Attack shortly after casting Sawring - Blitz Stage 2: Discordance to cast Sawring - Blitz Stage 3.
While casting Sawring - Blitz Stage 3, hold Normal Attack to continuously attack the target. Sawring - Blitz Stage 3 is automatically followed by Sawring - Eradication.
Release Normal Attack during Sawring - Blitz Stage 3 to automatically cast Sawring - Blitz Stage 3: Falltone, dealing Havoc DMG.
Sawring - Blitz DMG is considered Resonance Liberation DMG.
Chainsaw Mode - Dodge Counter
While in Chainsaw Mode, press Normal Attack following a successful Dodge to cast Chainsaw Mode - Dodge Counter, dealing Havoc DMG.
Press Normal Attack following Chainsaw Mode - Dodge Counter to cast Sawring - Blitz Stage 3. Hold Normal Attack while casting Chainsaw Mode - Dodge Counter to sustain the attack. When Chainsaw Mode - Dodge Counter ends, cast Sawring - Blitz Stage 3 automatically.
Release the Normal Attack button or Dodge without directional input while casting Chainsaw Mode - Dodge Counter to cast Sawring - Blitz Stage 2: Discordance automatically.
Chainsaw Mode - Dodge Counter deals Resonance Liberation DMG.
Sawring - Eradication
While in Chainsaw Mode, Chisa casts Sawring - Eradication in the following 2 ways:
Press Normal Attack after casting Sawring - Blitz Stage 3: Falltone.
Press Normal Attack after consuming all Ring of Chainsaw with Sawring - Blitz or Chainsaw Mode - Dodge Counter.
Attacking targets with Sawring - Eradication deals Havoc DMG and grants Shields to all nearby Resonators in the team for 30s.
The skill DMG is considered Resonance Liberation DMG.
Every 1 point of Ring of Chainsaw consumed by Sawring - Blitz and Chainsaw Mode - Dodge Counter increases the DMG Multiplier of the next Sawring - Eradication. Up to 100 points will be counted toward this effect.
Casting this skill consumes all Ring of Chainsaw and ends Chainsaw Mode.
Chainsaw Fever
While in Chainsaw Mode, Lifethread - Jetstream is replaced with Chainsaw Fever. Chainsaw Fever is at 100% by default.
When Chisa goes on for a period without dealing any damage, Chainsaw Fever will rapidly deplete. Once it reaches 0, Chisa enters the Burnout State and exits Chainsaw Mode.
While in Chainsaw Mode, Chisa resets Chainsaw Fever when dealing damage or when casting Resonance Liberation Moment of Nihility, Intro Skill Reverberance - Return and Sawring - Blitz Stage 3: Falltone.
While in the Burnout State, Ring of Chainsaw will rapidly deplete. Once it reaches 0, Chisa exits the Burnout State.
When in Burnout State, Chisa exits the state upon dealing damage, or casting Resonance Liberation Moment of Nihility and Intro Skill Reverberance - Return.
Lifethread - Glide
When Chisa is not in Chainsaw Mode and has more than 10 points of Lifethread - Jetstream, she can consume 50 points of Lifethread - Jetstream to cast Lifethread - Glide in the following 5 ways:
Press Dodge in mid-air before landing after casting Heavy Attack.
While in mid-air, press Dodge before landing after casting Resonance Skill Eye of Unraveling or Rending Lunge.
Dodge forward shortly after casting Thread Withdrawn.
Press Dodge before landing when launched into mid-air.
Press Dodge before landing after casting Lifethread - Glide.
Casting this skill can pull in nearby enemies marked by Unseen Snare.
During the skill, hold Dodge to glide a short distance on the weapon.
Can trigger successful Dodges within a certain time after casting this skill.
Ring of Chainsaw
Chisa can hold up to 100 points of Ring of Chainsaw.
Hitting a target with Normal Attack and Resonance Skill Eye of Unraveling grants Ring of Chainsaw.
Casting Resonance Liberation Moment of Nihility grants 40 points of Ring of Chainsaw.
Casting Intro Skill Reverberance - Return grants 20 points of Ring of Chainsaw.
Lifethread - Jetstream
Chisa can hold up to 100 points of Lifethread - Jetstream.
Chisa continuously obtains Lifethread - Jetstream over time.
Chisa obtains 100 points of Lifethread - Jetstream upon defeating a target.
Exiting Chainsaw Mode resets Lifethread - Jetstream to the max limit.
Chisa cannot obtain Lifethread - Jetstream passively for a short period of time after casting Lifethread - Glide.
Inescapable Fate
When a Resonator in the team defeats a target marked by Unseen Snare, the Cooldown of Chisa's Resonance Skill Eye of Unraveling is reset, triggered up to once every 3s.
All Ends Here
Casting Intro Skill Reverberance - Return or Resonance Liberation Moment of Nihility grants 20% Havoc DMG Bonus and 20% Healing Bonus for 12s.
When Resonators in the team with Thread of Bane defeat a target marked by Unseen Snare, Chisa gains Sight of Unraveling, lasting 3s.
While in Sight of Unraveling, Chisa inflicts Unseen Snare that lasts for 30s on the targets damaged by Resonators in the team with Thread of Bane.
Reverberance - Return
Attack the target, dealing Havoc DMG.
While not in Chainsaw Mode, press Normal Attack shortly after casting this skill to cast Basic Attack Stage 2.
While in Chainsaw Mode, use Normal Attack shortly after casting this skill to cast Sawring - Blitz Stage 2.
Unraveling - Law Zero
Grant Resonant Thread of Closure to all nearby Resonators in the team for 20s.
While in Resonant Thread of Closure:
When an attack hits, increase the max stacks of Negative Status and Electro Rage the target can receive by 3 for 15s. Unstackable.
Inflicting Negative Status or dealing Negative Status DMG grants Thread of Bane for 15s.
Sequence Node 1
Chisa is immune to interruption during Sawring - Blitz, Sawring - Eradication, and Chainsaw Mode - Dodge Counter
Inflicting Unseen Snare grants the following additional effects:
Chisa's ATK is increased by 30% for 15s.
Deal fixed 61803 points of Havoc DMG. The target's HP can be reduced to 61.80% at most and each target can take this damage only once. This instance of damage is considered Basic Attack DMG that does not bear any effect from damage bonuses.
Sequence Node 2
Ignore 10% of the target's Havoc RES when dealing damage.
Nearby Resonators in the team with Thread of Bane gain 50% All-Attribute DMG Bonus.
Sequence Node 3
The DMG Multipliers of Sawring - Blitz, Chainsaw Mode - Dodge Counter and Sawring - Eradication are increased by 120%. This effect is mutually stackable with that of Woven Myriad - Convergence.
The bonus DMG Multiplier for Sawring - Eradication granted by Sawring- Blitz and Chainsaw Mode - Dodge Counter when Ring of Chainsaw is consumed is increased by 120%. This effect is mutually stackable with that of Woven Myriad - Convergence.
The Vibration Strength Reduction Rate of Sawring - Blitz, Chainsaw Mode - Dodge Counter and Sawring - Eradication is increased by 50%.
Sequence Node 4
The effect of Unseen Snare becomes:
When targets marked by Unseen Snare take direct damage from Resonators, Chisa inflicts 1 stack of Havoc Bane on them. This effect is triggered up to once every 1s.
Sequence Node 5
Resonance Liberation Moment of Nihility gains 100% DMG Bonus.
Lifethread - Glide costs 50% less Lifethread - Jetstream.
Sequence Node 6
When Chisa takes a fatal blow during Sawring - Blitz, Sawring - Eradication, and Chainsaw Mode - Dodge Counter, she will remain standing with at least 1 HP.
Unseen Snare becomes Unseen Snare - Finality, which has the following effects:
Unseen Snare - Finality has all the effects of Unseen Snare.
Targets affected by Unseen Snare - Finality takes 30% Amplified DMG from Negative Statuses.
Targets affected by Unseen Snare - Finality takes 40% increased DMG from Chisa.
While the source of the materials can be quickly found in the game, when it comes Summer Flower you will have to gather them from the map. Check our Interactive map to find them quickly:
Review
Please keep in mind Wuthering Waves is a skill-based game and each character has a different playstyle, difficulty level and even special tricks and combos. Wuthering Waves is also a team based game and it's only by combining both these factors to the highest level a character can reach optimal performance.
Is the best Support for the current best Tower of Adversity team in the game;
Has grouping, healing and shielding capabilities greatly facilitating her use (particularly since Cartethyia, her best teammate, consumes her own HP);
Provides a very unique form of damage increase via DEF Shred/DEF Ignore which works well for all types of damage in the game.
Is in a “Roccia Situation” where she needs her Signature to stand out from a free, easily accessible option in a single team and even when she has it, the increase is only marginal while lacking team flexibility;
Majority of her buffs exist in the form of Negative Status (weak effects in multi-wave content) or only function on Negative Status appliers (Signature) and/or damage dealers (DEF Ignore). This restricts Chisa’s use-case to Negative Status teams and she has no reason to be used outside of them;
Her rotation is really long and doesn’t justify her low personal damage.
Chisa is a 5-star Havoc Broadblade Negative Status-oriented Support serving as the third slot teammate to Negative Status teams, capable of applying Havoc Bane which provides DEF Shred on the enemy, alongside extra DEF Ignore and DMG Bonus buffs for Negative Status teammates, as well as being able to increase the stack count of all Negative Statuses applied on enemies. Functional in single-target and AoE via grouping and multi-wave Negative Status application, while also having healing and a modicum of personal damage, Chisa presents herself as a generalist Support for Negative Status teams.
Chisa is capable of providing a specialized array of buffs for Negative Status-oriented team members, with a modicum of generally applicable damage increases, as follows:
Unseen Snare: Enables Chisa to apply Havoc Bane to enemies every 2s, and allows allies with Thread of Bane to ignore 18% of the afflicted enemy’s DEF.
Havoc Bane: Up to 12% DEF Shred at 6 stacks. Applied to the enemy by Chisa every 2s in the Unseen Snare status.
Thread of Bane: Provides 18% DEF Ignore to any character who applies a Negative Status on the enemy or inflicts Negative Status damage. Provides nothing to any characters who do not fulfill either condition.
Signature Weapon (Kumokiri): Provides 24% general DMG Bonus to any character who inflicts a Negative Status on the enemy. Provides nothing to any character who does not fulfill this condition.
Outro: Allows any character who damages any enemy to increase the maximum stacks applicable of any Negative Status and Electro Rage by 3.
All of these buffs will be permanently active in battle assuming any given character in the team can fulfill all activation conditions and the rotation lasts 30s or less (which is over the standard for any viable team in the game, generally around 25 to 28s). Also, all of her buffs and debuffs have mechanics intended to make them still applicable across several waves of enemies on Negative Status characters (but the ramp-up time across several waves of enemies still does make it less effective than in single-target encounters).
What’s important to note here is that almost all of these buffs either only pertain to Negative Status or only apply to characters who can inflict their own Negative Status/deal Negative Status type damage during their own rotation. Buffs will NOT apply if the character who wants to receive the majority of Chisa’s buffs is not able to fulfill these conditions by themselves. This makes most of Chisa’s kit not functional in any non-Negative Status teams. Ideally, the whole team has to apply their own Negative Status for Chisa to function at her maximum potential.
In other words, Chisa only functions in Negative Status-focused teams, and her use case as a generalist Support for non-Negative Status teams is nonexistent since even free characters like Baizhi can fulfill that role better. Additionally, her personal damage is too low to allow her to function effectively as a DPS.
It’s also worth noting her kit provides DEF Ignore (18%) and DEF Shred (12% at max Havoc Bane). Aside from the difference that Ignore is character-applied and Shred is enemy-applied, they function as different parts of the enemy DEF calculation. In the case of DEF reduction, it becomes more effective the more of it is reduced (similarly to RES reduction), so this actually works against Chisa since 30% Ignore or 30% Shred would actually shred more of the enemy’s DEF than the 18% Ignore and 12% Shred that she has.
However, enemy DEF is one of the few parameters that influence direct Negative Status damage (damage from ticks of Spectro Frazzle/Aero Erosion for example). Chisa’s unique ability to provide this DEF reduction may suggest that she could work with direct Negative Status damage dealers much more effectively than other Supports.
Lastly, her Forte Gauge called Ring of Chainsaw is the core of her own rotation. When her Forte Gauge is filled, she gains access to an Enhanced Skill where she gains access to Enhanced Chainsaw Basic Attacks which will conclude her rotation once the final attack has been cast, called Eradication. There are several ways to achieve this, but simply tapping Basic Attack during this state and then Swap Cancelling the last attack has proven to be most efficient, to minimize rotation time costs.
Chisa is mostly a Basic Attack-focused character with similar gameplay to characters like Galbrena and Lupa, so she will feel very familiar to players already used to those characters. This is because her Ultimate, Skill and Intro are all used once per rotation (or twice for her Skill in her Opener since an Intro is lacking) and other than that she only ever wants to press Basic Attack as her main rotation input.
A typical loop rotation will have her use her Intro for some damage and it immediately allows her to transition into Basic Attack 2. It also triggers the part of her Inherent Passive 2 which grants her 20% Havoc DMG and Healing Bonus for her rotation.
She then follows with some of her 5-part Basic Attack with her Basic Attack 2, 3 (also called Rending Lunge), and 4 (called Death Snip). Her Basic Attack 5 (called Thread Withdrawn) is not necessary to fulfill her Forte Gauge and is hence skippable.
Since her Forte Gauge is almost full, she can cancel the animation endlag via her Ultimate which deals a good amount of damage, provides a good amount of healing to the entire team and restores some Forte while enhancing the damage of her Chainsaw Attacks. Finally, she can then cast her enhanced Skill called Serrated Loop, cast her Chainsaw Basic Attacks until she casts the last one, Eradication, that she can Swap Cancel out of as soon as it is cast (this concludes her rotation).
For special effects, Death Snip has an additional DMG multiplier that can be obtained by pressing Basic Attack again a couple of times during the cast, so make sure to do this. It also provides some healing to the team. Additionally, her Eradication attack gains a boost of damage depending on how much Forte Gauge is left and provides a sizable Shield to the entire team, reminiscent of Brant’s, making her Sustain capabilities quite noteworthy.
She additionally sports a Dodge Counter which does not get in the way of her rotations that much, whether in her base state or her Chainsaw State; so make use of it if needed.
During her Opener, Chisa can replace her Intro by a use of her base Skill which immediately allows her to transition into her Basic 3. It can then be interrupted by her Ultimate to start another Basic chain starting from Basic 2 into Death Snip to fulfill both her Forte and Concerto needs.
Outside of her Opener, Chisa will never make use of her Base Skill as it generates too little Forte and Concerto Energy to be worthwhile. Any mid-air Attacks, Heavy Attacks, and her second Forte Gauge called Jetstream are all entirely useless to her rotation and are not worth discussing due to their inefficiency in the context of battle.
Chisa is, as of the time of her release, in a questionable meta spot in terms of cost-effectiveness. She has one big issue, and it is that she costs a lot compared to the return you are able to get on your investments. This doesn’t mean this can’t change, however we’ll definitely be marking her as a “skip until rerun unless you really like her” character, as she is in a similar meta position to Roccia on her release.
She is definitely the best in slot character for Cartethyia+Ciaccona, and there is no doubt about that. It’s fantastic news that she’s the best third slot to the best duo in the game in Tower of Adversity. However, that is only with her Signature weapon acquired, or only if the current endgame buffs favour Havoc Bane (which is why she will perform well on her release even without her Signature). In a vacuum however, while she has a fantastic F2P-accessible weapon choice in the form of Lustrous Razor - the standard banner 5-star -, she only adds to a team that was already complete, and with a free, permanently-accessible third slot teammate at that in the form of Aero Rover.
In the third slot to a Cartethyia+Ciaccona team, Chisa is only marginally better with her Signature than Aero Rover and worse without; the damage increase she provides to a team is much lower than Ciaccona even if Cartethyia+Aero Rover+Chisa works in a vacuum. Aero Rover provides almost the same utility to Cartethyia that Chisa does, since they also sport healing, a modicum of personal damage and buffs specialized towards Cartethyia that allow her to make full use of her kit via increasing the Aero Erosion stack cap by 3. Not to mention, all of Aero Rover’s Sequences and Weapon Ranks are accessible permanently, for free, and Cartethyia’s inherent kit buffs are designed to work with Aero Rover and not make them as clunky to use as they would usually be.
Even still, in a Cartethyia team, Chisa’s value is hindered in Whimpering Wastes where enemies are defeated quicker than her Havoc Bane can apply, whereas Aero Rover does not struggle with this as they do not apply any Negative Status of their own and are intended to work just as well whether in multiwave or single-target content, which hinders Chisa’s pull value outside of Tower of Adversity even further.
In the third slot to any other Negative Status-oriented teams, Chisa is worse than pre-existing options (Shorekeeper or Spectro Rover in a Zani+Phoebe team; and way too many Absolution Phoebe teammates like Phrolova, Mortefi, Sanhua, Iuno, Ciaccona, and of course Chisa can’t replace Spectro Rover). In non-Negative Status teams, as discussed earlier, Chisa does not have access to the majority of her buffs that could give her a modicum of generalist use case, so even characters like Baizhi end up outclassing her as a generalist.
In conclusion, since Chisa only adds to an already complete team and is not worth bringing anywhere else, and she requires her Signature Weapon at minimum to even get to that level, her pull value from a meta perspective is questionable at best, facing a similar situation to what Roccia or Cantarella faced on their releases. In that sense, she feels incomplete; however her unique ability to reduce and ignore parts of an enemy’s DEF, as well as being the only current Havoc Bane applier, could carve out a meta niche for her in the future. She may be a worthwhile investment in the future, and she’s also definitely worth getting right now if you really like her as a character; however our best advice for meta followers is to consider carefully whether you wish to get her now, or wait until a rerun to invest in her.
Build
The percentages show the performance of the weapon based on calculations, but in some cases, some weapons might provide additional QOL that can't be quantified and it would push that weapon ahead of others in the priority (and in those cases, we would put that weapon higher).
Chisa calculations were done using added buffs from the following teammates:
Trailblazing Star
Chromatic Foam
100.00%
90.10%
84.80%
84.30%
83.90%
82.60%
81.80%
73.60%
73.50%
1
Chisa's best set to maximize her personal damage, which grants her 20% ATK and 30% Liberation DMG Bonus for 5s when applying Havoc Bane. Considering she applies Havoc Bane every 2s all the time and primarily deals Liberation DMG, this set is meant for her.
Best combined with your choice of:
Havoc Eclipse
Midnight Veil
Endless Resonance
Moonlit Clouds
Empyrean Anthem
Below you can find Main Echo options:
Substats: Energy Regen (Until Satisfied) > CRIT Rate = CRIT DMG > ATK% > Liberation DMG% > ATK
All recommended endgame stats portray a fairly good quality endgame build as a goal to aim for on most characters. However, don’t treat this as an end-all-be-all, and more of a suggestion.
All stat recommendations are given at S0 for 5-stars, S6 for 4-stars, and free characters (unless specified otherwise), based on total stats in the in-game stat-screen with the character out of combat but also active in the party (and hence some buffs may or may not apply). Any other precision may be directly specified. If not specified, Energy Regen requirements are estimated in the character’s best team.
HP: 15000+
DEF: 1100+
ATK: 2000-2500+
CRIT Rate: 65-80%+
CRIT DMG: 210-255%+
Energy Regen: 125%+
Havoc DMG Bonus: 40-70%+
Below you can find the order of leveling the abilities for Chisa.
Forte Circuit
Res. Liberation
Basic Attack
Res. Skill
Intro Skill
Skill and Intro can be skipped when levelling to save on resources at a minimal damage loss.
Gameplay and teams
Chisa’s kit focuses on accessing her Chainsaw Enhanced state as quickly as possible via her Skill in order to leave the battlefield as quickly as possible after casting her Chainsaw Enhanced Basic Attacks. To do this, she must replenish her Forte Gauge using her Intro, regular Basic Attacks, and her Ultimate, as well as a base Skill if necessary provided an Intro isn’t readily available. Her rotations could hence look like this:
Echo Timing: Used right before Ultimate to cancel its cast animation.
Since Chisa acts as the first character in her only current viable team’s rotation (the Cartethyia team) she will need to execute an Opener since an Intro won’t be available, as follows:
Skill: Eye of Unraveling
Basic: Rending Lunge (Cancel animation endlag via Ultimate)
Ultimate
Basic 2
Basic: Rending Lunge
Basic: Death Snip Full (Cancel animation endlag via Skill)
Skill: Serrated Loop
Basic: Sawring Blitz 2
Basic: Sawring Blitz 3
Basic: Falltone (Happens automatically)
Basic: Eradication (Swap)
Outro
This rotation will be used on every rotation following the Opener, since an Intro will be available at that point:
Intro
Basic 2
Basic: Rending Lunge
Basic: Death Snip Full (Cancel animation endlag via Ultimate)
Ultimate
Skill: Serrated Loop
Basic: Sawring Blitz 2
Basic: Sawring Blitz 3
Basic: Falltone (Happens automatically)
Basic: Eradication (Swap)
Outro
Outside of her Eradication Basic Attack, Chisa has a lot of Swap Cancel windows that she can use during her or other characters’ rotations. The most ideal ones are as follows:
Basic: Eradication — always Swap Cancelled at the end of her rotations;
Basic: Rending Lunge — can be Swap Cancelled optionally during her Opener or during Cartethyia’s rotation (accessed after a Skill).
Skill: Serrated Loop — optionally Swap Cancellable to manage other characters during Chisa’s own rotation.
However, remember Chisa is not exclusively limited to those Swap Cancels, and any amount of Forte she charges before her own Intro will drastically speed up her team’s rotation, saving on precious time. Since Cartethyia has a lot of Swap Cancel windows (particularly in Fleurdelys form), Chisa can swap in and save a lot of time by doing parts of her rotation before her Intro even starts. This is also entirely possible to do in a Zani team (although Spectro Rover is stronger in that role), since Negative Status Amplification Outros (like Ciaccona’s and Chisa’s), don’t expire on Swap (and neither does Aero Rover’s). This gives Chisa a lot of rotation freedom and room for experimentation — feel free to try more advanced team combos with her than we list here!
Please note that while Chisa is theoretically usable in all Negative Status teams, including Zani teams and DPS Phoebe teams, that does not necessarily mean she is worth using there. Since pre-existing, free options outclass her, we chose not to list those Teams & Synergies and instead only featured the one team where Chisa has some return on investment.
Team #1: Best Team
Team #2: Hiyuki Team
Team #3: Cartethyia Team
Chisa is only stronger than Aero Rover in the third slot with her Signature. Also remember to use Skyfall Severance to convert Havoc Bane into Erosion if you use them with Chisa!
Team #4: Phoebe Expert Team
Chisa is only worthwhile here with heavy investment and quickswap involved. She is otherwise easily outshined by the likes of Lynae and Phrolova. Generally not recommended to most players. Use Ciaccona in Whimpering Wastes, otherwise stick to Spectro Rover.
Calculations